Quantcast
Channel: Marine's
Viewing all 249 articles
Browse latest View live

RealRestraint update to v1.24

$
0
0
Hello there !

I've been very, very, very busy lately, working on the upcoming update to v1.24 of all the RealRestraint products.

Actually, 1.24 is a misnomer, it should have been 1.30, considering the number of changes. But this is just a number, don't mind it. It's just that at first it looked just like a new iteration... one year ago. I've been working on this update for quite a while in the background, some of the "new features" are in fact at least that old. But some bugs needed fixing before releasing that update, and I figured out the fixes only recently.

I wouldn't normally write a full blog post for release notes, which belong to the updater. But this time this is so big that I think it deserves both a blog post and pictures.

But first things first, you must be thinking "Oh no, not another update to RR, I will have to resize all my stuff again !". Not this time ! I have created a couple scripts that will save you hours of frustration : "Copy Shape" and "Paste Shape". I have written a tutorial just to explain how to use those scripts, which you can find here :

http://realrestraint.blogspot.com/2014/02/copy-shape-paste-shape-scripts.html

In short, you put the "Copy Shape" script inside the original piece of equipment you have just updated, and the "Paste Shape" script inside the new one, and you let the scripts do the job. And if you had tweaked some prims individually on the original object, the scripts will let you copy the tweaking just by clicking. It's easy, you'll see.


Now that we've got this out of the way, let's take a look at the main focus of this update :

  • New Autolock plugin : I have completely rewritten the old Autolock plugin to make it clearer, easier to use and more powerful, and of course more devious.

  • New Wriggle plugin : I have rewritten that one too because nobody was ever using it, since it was unclear and too difficult. Its purpose is to let the bottom switch a restraint from one lock to another, like from standing with the legs tied together to laying down with the legs tied the same way, and back. Or switching the hands from back to front. Or kneeling to hogtie, etc.

  • Reworked the Anim plugin so it is more useful and more powerful, and merged the two RR Anim HUDs into one.

  • Added the ability to run while in bondage.

  • Added and re-organized poses in the restraints

  • Re-added "hands to collar" and "r-prayer"to the Restrained Elegance cuffs. Also added them to the Vixen cuffs in the process. This was a popular request.

  • Added a body harness chain for the 3rd lock of the Restrained Elegance cuffs, exactly like the one in the Vixen leather set.

  • And many bug fixes and improvements.

I hope this was good enough an appetizer... let's see the complete list now.


Bug fixes in the legs restraints

  • Sometimes when the legs are locked, we could only move backwards until the restraint was unlocked, unworn, worn again and locked again, or until a relog. This was due to a race condition and this bug was the actual blocker for this update. I'm glad it is sorted out now.
  • Added a way to run and jump even when the legs are bound, but not too tight.
  • When "Autoref" is off, the legs restraint will now not allow moving at all. This is useful when wearing two different legs restraints, only one should allow moving.

Autolock V2
Completely rewritten the Autolock plugin :
  • Made it easy and fast to use as well as intuitive.
  • Up to 6 macros (a macro is a programmed lock) to be executed sequentially.
  • Ability to save and load macros.
  • Each macro can start either when the previous one is executed, or when the restraint is unlocked, allowing for fine-control of the timing.
  • The macros can be made to loop, sticking the bottom into an endless loop of bondage. Be careful, this could prevent her from struggling out altogether !
  • The current tutorial for the Autolock plugin is now out-of-date, it will be updated soon.
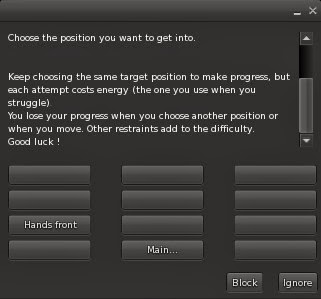
Wriggle V2
Completely rewritten the Wriggle plugin :
  • Made it easier to understand and use.
  • When bound, you just choose which lock you want to switch to, if any (it is made to be realistic, you can only switch to another lock if it makes sense to do so, for example moving the cuffed hands from the back to the front, or laying down on the floor while being up on the feet with the legs bound).
  • Each attempt makes you look like you're struggling, when applicable.
  • You must score several successes to go to that lock, each attempt has a percentage of success and costs energy (the very energy you use to struggle out).
  • The more restraints you wear, the more difficult it gets (it's easier to try to stand up from a lying position when your hands are cuffed together than when they are in a yoke, for example).
  • You lose all your progress if you move.
  • When successful, the lock changes but not the progress in struggling out, if any. Likewise, if you were tied up in the "Lie" lock and later used wriggle to switch to "Tight" to stand up, struggling out will retain the difficulty of the "Lie" lock.
  • The current tutorial for the Wriggle plugin is now out-of-date, it will be updated soon.

Anim plugin and its HUD
  • Merged both identical HUDs into one, and added a button to switch between arms and legs restraints.
  • Added buttons to control the pose more finely : you can go one step, two steps and three steps back and forth, but also back to the first pose or go to the pose halfway down the list.
  • Fixed a bug where going back to the first pose on a restraint with "Autoref" off would set its cycle time to 30 seconds.
  • Changed the interface in the plugin to give you the ability to choose the pose directly.
  • When switching to a pose, show its name in the chat history (only to the owner of course).
  • When "Autoref" is off on a restraint, its Anim plugin will ignore all commands until "Autoref" is switched back on (it can be controlled in the "More..." menu of the restraint).
  • Made room for memory in both the plugin and the HUD.
  • See http://realrestraint.blogspot.com/2014/02/rr-tutorial-anim-plugin-v3.html for details.

Lockable/Unlockable (the main script for every restraint)
  • Show the display names instead of the user names.
  • Show the energy left on the menu.

Animations
  • Made a new, better-looking Taut walk for the legs restraints.
  • Made run animations for the Taut and Hobble poses in the legs restraints.
  • Re-added "R-prayer" and "Hands med" (hands chained to the collar) to the Restrained Elegance arms cuffs, like before.


  •  Added those two poses to the Vixen cuffs as well.

 
  • Added the hands-to-collar poses to the first lock of the Restrained Elegance cuffs and the Vixen cuffs.
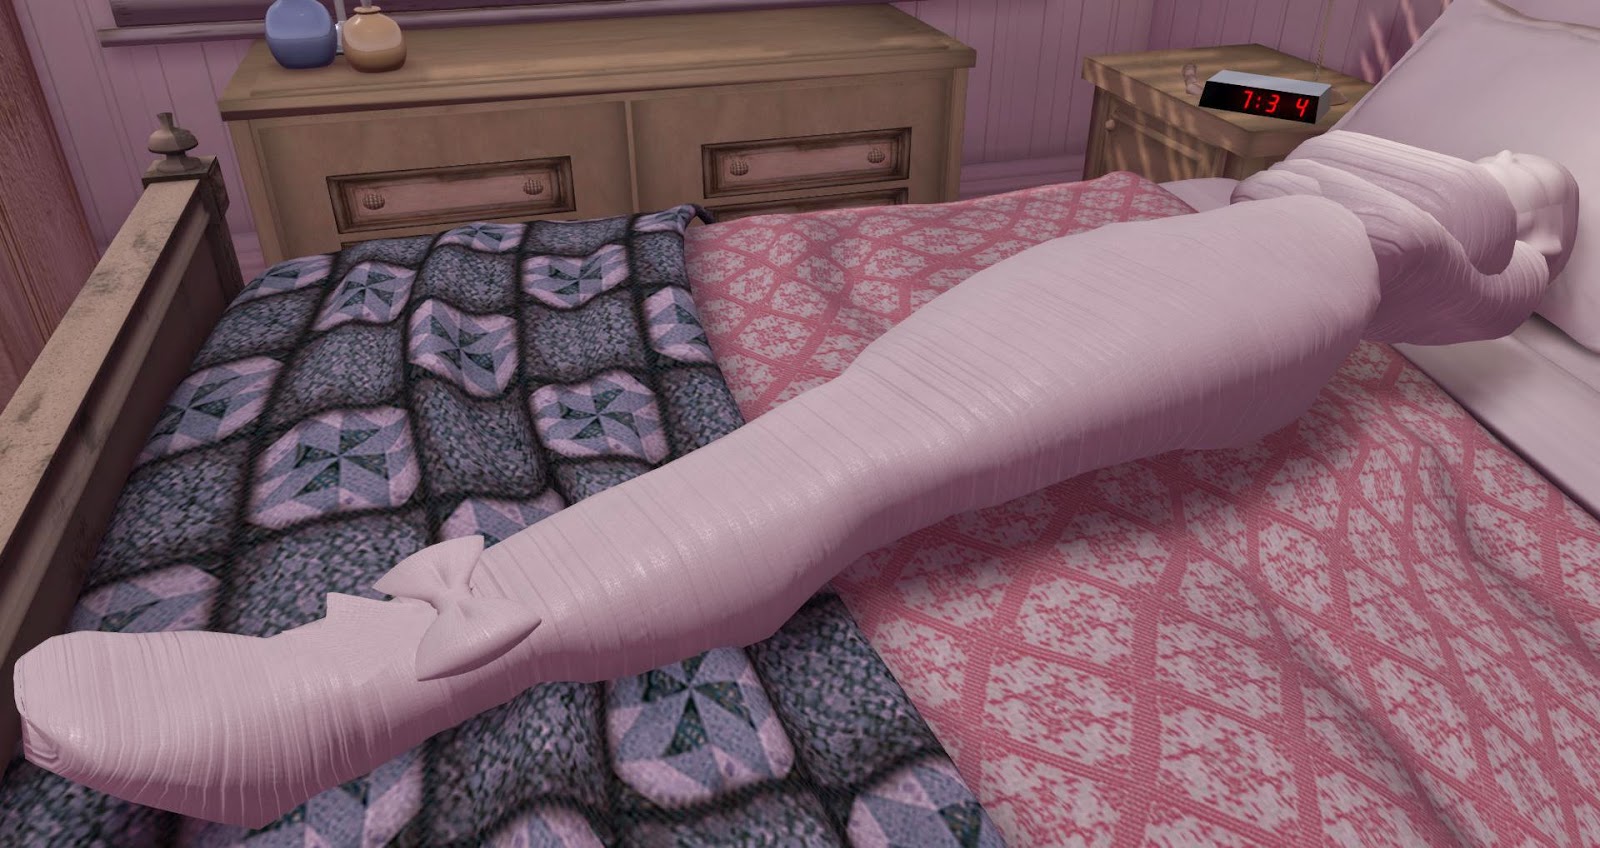
  • Added a "kneel bundle" pose to the legs restraints.
  • Added a body harness chain to the Restrained Elegance cuffs, exactly like that of the Vixen, for the 3rd lock (elbows chained back and hands chained in front).
  • Added an "elbows only" lock to the arms straps.
  • Added "lie" poses to the Hobble and Taut locks in all the legs restraints, so you can lie down when in these locks (since it is trivial to go from standing to lying when the ankles are no tied together, no need to use the Wriggle plugin for that).
  • Organized a few animations better in the restraints, in particular the hogties.

Various
  • Gags : added the necessary scripts to make them compatible with the Happy Spanker from Marine's Goodies.
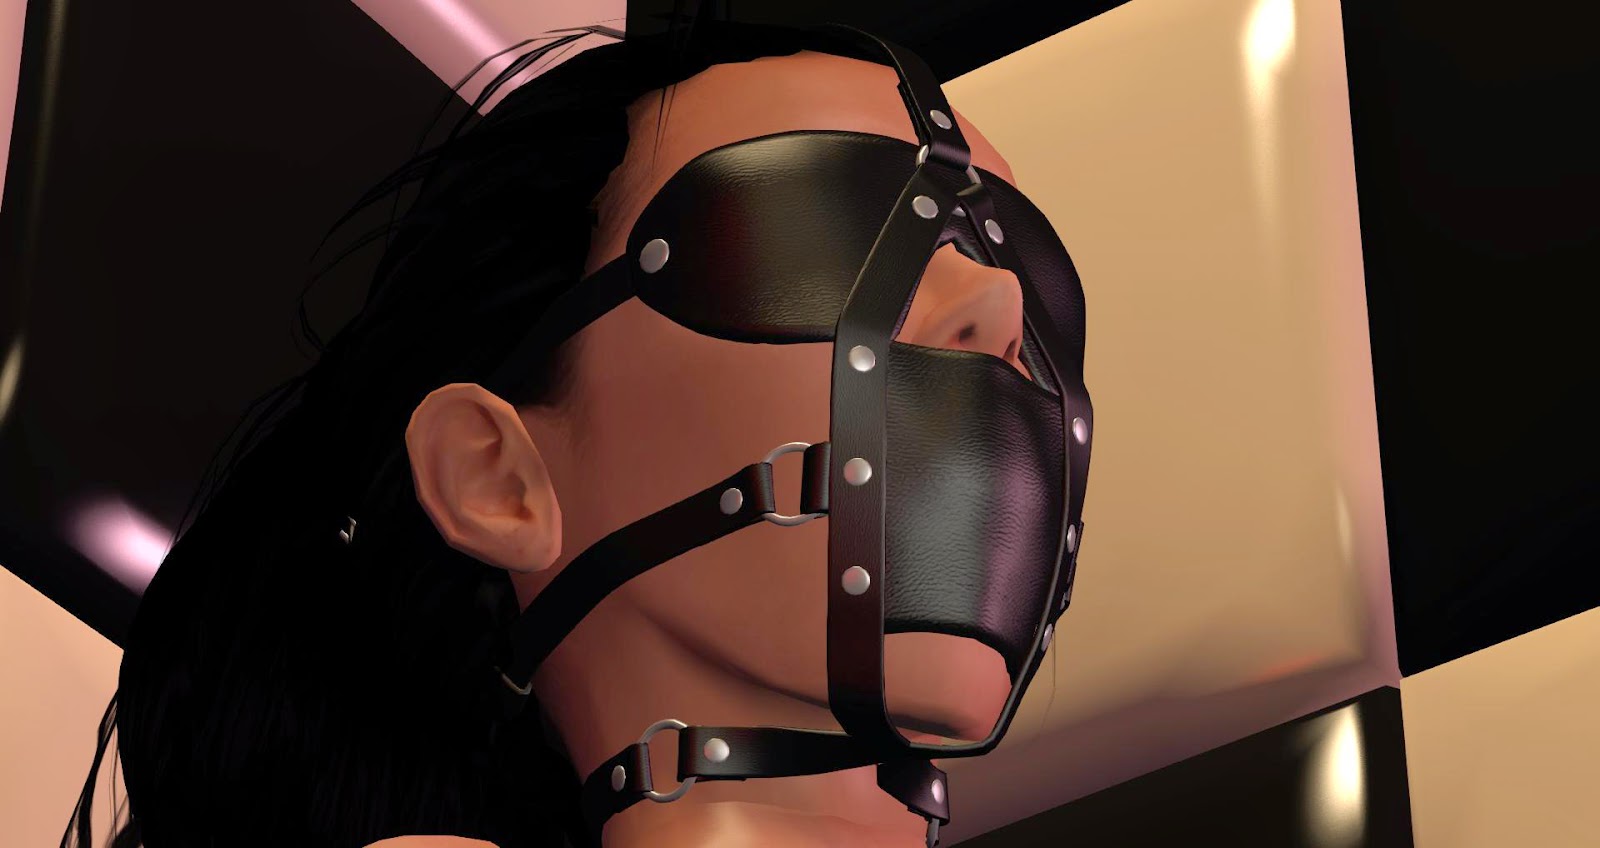
  • Isolation hood : removed the invisiprims and added an alpha layer instead.
  • Gags : changed the defaults to be a little more user-friendlier (in particular, don't throttle the emotes by default), and allow OOC chat ("((...))") without being accused of cheating.
  • Sit plugin : Removed the "no stand" restriction automatically when unlocked. This was confusing subs big time and could put them in awkward situations.
  • Vibrators for the Siren ropes : they did not remove their listeners after saying something on channel 0 when choosing a custom tint.
  • Renamed the Vibrators to "XXX's vibrator" to avoid confusion.
  • When saying a custom tint on channel 0 to a vibrator and to the SirenTex plugin, allow these two formats : three floats from 0.0 to 1.0 or three integers from 0 to 255.
  • Outfit plugin : made the "Attach" button behave like "Attach over".
  • Scarf blindfold : Replaced the main script Lockable with Unlockable, to act like ropes (this was done the other way before because that blindfold was created before the Shibari ropes, so the script "Unlockable", which is used in ropes, didn't exist at the time).
  • Siren & Shibari ropes : made the texture plugins available to the sub as well. I know this is not very realistic (when you're bound in ropes, you shouldn't be able to suddenly change their color), but a lot of tops are sloppy or ignorant of this feature, so they don't bother matching the ropes to make the sub look good. And looking good is half the fun when in bondage !
  • Police handcuffs : now only the wrist cuffs show when simply "locked", and not the elbow cuffs.
  • Harmonized all the RLV plugins (Allow, Control, Outfit, Sit, Touch, Unwear, Wear) so that they are now contained into all collars and wrist restraints, to avoid confusion.
  • Made those RLV plugins handle 8 locks instead of 6.
  • Jammer : Made it say display names on the chat instead of user names.
  • Jammer Remote : Made it add "Resident" after the name of the target when forgotten.
  • RR HUD : Sometimes it wouldn't work in no-script areas.
  • Made it so a restraint wouldn't poll for its RR HUD when detached (it would spam the user when further than 10 m away otherwise).


Have fun !

Marine

RR tutorial : Autolock plugin v2

$
0
0
Hello there, we are going to dwell into another one of the most complete and versatile plugins in the RR suite : the Autolock plugin. It is also part of the standard issue, so every restraint has one.


You have already heard about normal keys, RealKeys (I hope), release timers, long timers, RL timers etc etc... yes that's beginning to be a lot of concepts to learn. The Autolock uses all these concepts and more, so this is complex stuff. Very few people grasp all its subtleties, so don't be ashamed if you master only 25% of its capabilities. Bear with me, this tutorial is going to be very long.

Please note that this is the second version of the Autolock plugin, this one is a complete rewrite and has been introduced in v1.24 of the RR products. You can find the tutorial for the old version here.

There are multiple purposes to this plugin : you could want to program your bottom's restraints to automatically lock themselves after a while while she's wandering around, or you could want to make her already tight bondage vary a little over time, or you could want to make her struggles even more difficult by regularly re-locking her restraints even when you are not around... It's quite versatile.

Before we start explaining what this plugin is all about, let's take a look at its menus first. I click on my Vixen cuffs and I go to "Plugins..."> "Autolock..." :


What you see is the (currently empty) list of "macros" to be run by the Autolock. But as written on the top of the menu, "Macros : 0 / 6" so... not much is going to happen here until I do something about it.

But what is a macro ? Does it have something to do with Word or Excel macros ? As a matter of fact, it does, loosely. A macro is simply a programmed lock with a delay (when to lock), a level (which lock to choose), a timer (how long will it stay locked that way) and other options (will the keys be left or taken, will it start counting now or when the restraint is unlocked, stuff like that).


Ok this is all too theoretical so how about an example ? Let's do this. I click on the big "+" button on the upper right corner, and I get this menu :


Whoa. What is all this ? There sure is a lot of information in there. Where to begin ?

In fact we are not going to review it now, let's just press "CONFIRM" and see what happens.


Ok this is interesting : the menu shows me there is a macro in the list, that it is running, there is some kind of countdown that shows "01:00 (RL)" and that it will lock to "H+E back", which is the lock that was used last on these cuffs. Oh, and the chat says :

[01:26] Leather right wrist cuff (r forearm): : Device autolocking in 1 hour.


Ok, fine, one hour it is. I'll wait...

*Files her nails*

*Watches TV*

[02:56] Leather right wrist cuff (r forearm): : Device autolocking in 30 minutes.

*Pays no attention to the chat*

*Goes shopping*

*Falls in love with shoes*
[02:16] Leather right wrist cuff (r forearm): : Device autolocking in 10 minutes.

*Still pays no attention to the chat*

*Goes shopping some more*


[02:21] Leather right wrist cuff (r forearm): : Device autolocking in 5 minutes.
[02:24] Leather right wrist cuff (r forearm): : Device autolocking in 2 minutes.
[02:25] Leather right wrist cuff (r forearm): : Device autolocking in 1 minute. Last warning, get ready...


Suddenly I am stopped dead in my tracks by a familiar noise and my arms are rudely cuffed behind my back in front of everyone.

[02:26] Leather right wrist cuff (r forearm): Marine's Leather right wrist cuff (r forearm) automatic lock triggered
[02:26] Leather right wrist cuff (r forearm): Marine has been locked by Marine ("H+E back").
[02:26] Leather right wrist cuff (r forearm): Marine's Leather right wrist cuff (r forearm) automatic lock triggered
Executing macro 1/1
Type : H+E back
Timer : --:--
Keys taken
Block : DEFAULT
Mouselook : DEFAULT


Who the hell... Oh I understand, I was so busy I completely forgot about that autolock and now I'm stuck ! Ok, ok, it's not that bad, I still have my own keys and no timer is set, so I can unlock myself, which I do now.

Then I take a look at the Autolock menu again, and... oh this is interesting :


The menu shows me the macro, but it is now "stopped" (I can tell from the big square icon on its line). Does this mean it won't trigger anymore ?


Ok, so let's review what happened here during this quick example.

The macro that was created had default settings since I hit "CONFIRM" without changing anything. These default settings were :

- Set to the last lock used (in this case "H+E back")
- No timer
- Give the keys to whoever has created that macro (that's me, in this case)
- Lock after one hour real time (meaning, no need to stay online the whole time)
- Block & Mouselook settings are unchanged
- The macro starts as soon as possible and does not wait for the restraints to be unlocked first

Easy enough. As complex as this plugin is, I have made it so the menu is always pretty self-explanatory so you don't get confused about some cryptic settings. It is important to know what you're doing, because you can make your program really sophisticated.

Macros ? Program ? Is there some hint of geekery here ? Probably so. This is exactly what it looks like, the Autolock is a way to program the restraint so it executes your instructions in the future. Instructions in this case are macros, and you can define up to 6 of them. Each macro will need the previous one to be executed before starting.

This is the most important bit about this plugin, so I will write it again in bold :

Macros are executed in sequence, not all at the same time.

So in order to have Macro nbr 2 start, you must wait until Macro nbr 1 has executed, i.e. its countdown has reached zero. There is a little subtlety here : you can set your macro to require the restraint to be unlocked on top of it (it doesn't by default).

In other words, you can set a macro so it starts either at the moment the previous macro is executed, or after it has been executed AND the restraint has been unlocked (which can be a while later).

A little drawing is worth a thousand words, so let me show you a good way to see it. Firstly, this is a macro :


As you can see, a macro has a part before it is executed, and a part after it is executed. The countdown runs until it reaches zero, then the macro is executed, and the wearer is locked afterwards. After a macro is executed, it is set to "Stopped" and the next one may begin counting down.

Actually whether the next macro begins counting down or not depends on its "While free" option. If that option is turned off, then it starts counting down immediately after the previous macro is executed (and the wearer is locked up). If it is turned off, it will wait until the restraint is unlocked before counting down, as indicated on this drawing :


With me so far ? This drawing is pretty easy to understand, you see the difference immediately. The starting point of the second macro depends on its own "While free" bit. Please note that the option is called "While free" and not "When free". This means that even if the macro has already started counting down, if the restraint is suddenly locked for other reasons, the countdown will be suspended until the restraint is unlocked, and only then will it be resumed.

So if you create several macros, some with "While free" set to "on" and others set to "off", you may end up with such a program :


On this drawing, Macros 2 and 4 are set to "While free OFF", while Macro 3 is set to "While free ON". For this example, we don't care about the "While free" setting of Macro 1, but we would if the wearer was locked during that time. You can see that if a macro is executed while the wearer is locked, the current lock is replaced by the new one... but if the macro is set to add time then it will do exactly that : time will be ADDED to whatever timer was already set at that time ! This is a small but important detail.

Finally, each macro has an "Online" setting as well, which determines whether the countdown runs all the time or only while the user is online.


If the "Online" bit is set to "OFF", then the restraint will be locked as soon as the user logs on, provided the countdown has already reached zero. Autolock does not deduce the time spent offline from the timer to set, though.


Now that you know the theory behind the execution of macros, let's see what the rest of the buttons do.

Let's suppose I have created 6 macros, each one with a different lock but all of them with a 30 minute countdown. What does that give us ?


Wow, now we have a lot more information than we can handle, here. But you need to understand what you see so here is what it all means...

The text above the buttons is the list of macros with their status : "Running", "Paused", "Stopped", "Waiting for previous" and "Waiting for unlock".

- Running : The macro is currently running, only one macro may be running at any time.
- Paused : The currently running macro is paused because someone has pushed the "Run" button until it turned to "Pause", pausing the whole plugin.
- Stopped : The macro has already been executed (its countdown reached zero) and will not count down again until it is rewinded.
- Waiting for previous : The macro has a positive countdown but is not the one Running yet, it is waiting for its previous macro to be executed.
- Waiting for unlock : The macro is currently running but its "While free" bit is set to "ON" and the restraint is locked, so it has to be unlocked before the macro is resumed.

Before dwelling into each macro individually, let's see what each button does :

- + : This button lets you create a new macro, but only if there are no more than 5 already created.
- 1 to 6 : Pressing this button brings you to the pages of the corresponding macro, with its individual settings to be set.
- Rewind : Resets all the countdowns, effectively going back to the start. Exactly like rewinding a tape.
- Run/Loop/Pause : This button lets you run and pause the plugin, but also set it to "Loop", meaning that when the last macro is executed, it automatically rewinds the whole program back to the start.
- Move up and Move down : Moves the currently selected macro up or down in the list. The selected macro is the one you clicked on last, or the one you've just created, it is the macro which line starts with an arrow.
- Main... : Goes back to the main page of the restraint, like any plugin in the RR line.
- Advanced... : Leads to a page with more buttons to control the macros as a whole.


On this "advanced" page (which is really nothing more than "page 2" of the same controls, I was just lacking room on the menu, that's all), you find the same 6 lower buttons (except "Advanced..." which becomes "Back..." to return to the first page) and the following upper buttons :

- Delete all : Deletes all the macros. Careful, there is no confirmation and no undo.
- Countdown yes/no : When activated, the countdown says on the chat (heard only by the wearer) how much time is left. It does that 1 hour, then 30 minutes, 10 minutes, 5 minutes, 2 minutes and finally 1 minute before the next execution. When it is deactivated, the wearer would not get any info and will likely be taken completely by surprise.
- LOAD and SAVE : Allows the user to load and save a full program by copy and pasting messages on the chat. It is easy, one only has to follow the instructions given by the plugin at the moment they press those buttons.


Now that we've got all the main buttons covered, let's see how to set up an individual macro. Who said "it's about time" ? I understand that the introduction was long, but it was necessary to grasp the underlying design, and ultimately to know what you're doing when setting up an autolock.

I go back to the first page of the plugin and click on, say, "1" to edit the first macro.


What you see on the text above the buttons is the full textual representation of the macro you are currently editing (whether it is new or already exists). For example, this one says :

> - Running : This macro is currently running, and will be executed when its countdown reaches zero.

Delay : 00:30 (00:28 left) (SL) : This is the countdown, both initial and current. The "(SL)" part means "online".

-> "Hnd front" : This is the lock the restraint will be set to once the macro executes.

Timer : --:-- : This is the timer the restraint will set once locked by this macro.

Leave keys : NO : The keys will be kept by whoever created that macro.

Block : DEFAULT : The "Block" setting (preventing from touching objects) will not change once locked.

Mouselook : DEFAULT : The "Mouselook" setting (being forced to first view) will not change once locked.


There are actually 3 pages of control to create and edit a macro. This is the first page, which allows you to change the delay (the countdown), to decide whether to count real time or online time only, to set the "While free" bit and to paste the last macro that had been created or edited (this is useful when creating a bunch of macros in a row, all with similar settings).

If you press the "-30 mn" button while it is already set to 30 minutes of delay, it goes down to 10 minutes only, which is the minimum.

The three buttons at the bottom allow you to decide what to do to the macro itself (and then brings you back to the main page) :

- DELETE : This will delete the macro.
- CANCEL : This will cancel all changes that you have done to the macro.
- CONFIRM : This will save the macro (and copy it for the next time you press "PASTE" on another macro), creating it if it didn't exist before.

When you press "Choose lock..." you are brought to the second page, the page that lets you choose the lock to be applied. It is pretty straightforward here :


Each button is a lock as defined by the restraint, and the "Just lock" button will do exactly what it says : it will lock without a pose. Press "Back..." to return to the first page.

When you press "Timer/options..." you are brought to the third page, where you can set a timer and some options :


On this page you can choose to make the macro leave the keys on the restraint (don't forget to set a timer, then, or the wearer will be able to free herself), or keep them. You can decide whether the victim is to be Blocked (i.e. prevented from touching anything) and/or "Mouselooked" (i.e. forced to stay in first view). Block and Mouselook have an effect only with arms restraints, just so you know.

You can also rewind the macro, which means setting its current countdown to its initial one, and of course you can decide the timer to set once locked.


There are a handful of subtleties to keep in mind, when using the Autolock. Nothing bad, but things that could surprise you if nobody explains them to you :

- By default, the lock will be the one that was chosen last at the time of the creation of the macro (not of its confirmation).

- When you want the macro to keep the keys, they go to the creator of the macro only if they were on the restraint at the time of its execution. Otherwise they stay in the possession of whoever had them at the time, to avoid surprising them by snatching the keys from their hands.

- Changing the delay and confirming rewinds the macro.

- If you choose to run the Autolock in a loop, keep in mind that this will drive the sub crazy, and possibly get her stuck into an endless loop of bondage because the restraint will keep relocking itself without giving her a chance to struggle out. This may be what you want though !

- You can't set an exact RL schedule with the Autolock, since it waits until the sub logs on before firing its locks. This is due to the fact that the timer to set does not decrease even if the sub was offline at the time when the restraint was supposed to be locked.


- If your restraint does not have keys, like ropes, blindfolds and tape, some terms will change from "lock" to "tie", but the way to use it is strictly the same.

- Last but not least, there seems to be a known issue when using the Autolock for the first time with "online" off. Apparently it will lock right away. It will do that only once though. I will work on that later and see if I can come up with a solution.


Whew ! That's pretty much it. I'm sorry if this tutorial was long-winded, but this is a complex plugin and many things needed to be explained.

I hope you'll have fun with the Autolock !

Marine

RR tutorial : Wriggle v2

$
0
0
Hi !

Today I'm going to show you an old new plugin : the Wriggle plugin.

Wait, is it old or new ? Well, it is an old plugin as it has been introduced into the RealRestraint brand years ago, in fact nearly since the beginning, but it is new because this tutorial is about the second version of it. I never had the time to make a tutorial for the first version, and although it was working, I've been so bad at making it usable that very few people knew it even existed.

Hence the total rewrite, and hence the tutorial. I know that such a plugin makes bondage even more enjoyable for the sub, and is a nice addition to being able to choose the pose thanks to the Anim plugin.

So what's this "Wriggle" thing anyway ?

You already know that since v1.22 of the RealRestraint products, you are able to change your pose while in bondage. For example, lifting your hands, kneeling or sitting down, rolling over, anything you can think of, that doesn't change the bondage itself. To do this, you simply use the RR Anim HUD (included with every arms and legs restraint) to browse through the many available animations, until you find the one you like.

But there are cases when you may want to go further, and you can't do that just with the Anim HUD. For example, you may want to lay down while you're made to stand with your legs tied, or the opposite (you are bound laying down and you want to stand up), or your hands are tied behind your back and you want to bring them to the front (or the other way around). But doing that changes more parameters than just your pose : the speed of movement (you hop faster than you crawl), the touch restrictions (which may be different when your hands are in front than when they are behind your back), and so on.

All these transitions are realistic, you can do them in real life, but without the Wriggle plugin you can't in SL. This is because they technically make you change the lock itself (from "Tight" to "Lie" and back, from "Hands back" to "Hands front", etc), and that means changing some restrictions and other settings along with it.

This is where the Wriggle plugin comes in handy. It allows you to try your luck at changing to another lock (when permitted), in exchange for some time and some energy cost. The same energy that is used for struggling. So in the end, that comes down to choosing between either trying to struggle out, or getting comfortable in bondage.

So, in short, the Wriggle plugin is like a bridge between one lock and another, provided that bridge makes sense.


Ok enough talk, let's do it ! The plugin itself is pretty easy to use, you generally have only one button to click, the real difficulty is deciding whether to click it or not.

Let's say my hands are tied behind my back with Siren ropes, and I want to bring them in front of me. In real life, that would imply trying to get them past my butt, then between my legs, and finally stepping out. The first part is what requires nimbleness and effort, and is not guaranteed to succeed.

Oh, of course I could raise my arms behind my back, change the pose a little...


... but I want them to go to the front instead.

Firstly, I go to the plugin itself by clicking on my ropes, then going to "Plugins..."> "Wriggle...". Note that only the wearer has access to that plugin and nobody else.


Ok so I have only one button at my disposal, and a few information on the menu itself, such as the energy left. Notice that this is the same energy that is written on the main page of the restraint, only in decimal (*) with a one-digit precision.

It also says... let me scroll down on the menu :


This little text is displayed as a short manual, it doesn't change.

So I click on "Hands front" and...


Aha, there is a lot more information here now. Let me explain.

Firstly, now that the plugin knows which direction to take (I had only one choice but in theory there could have been several), it knows the actual objectives and costs to reach it, and it displays them in plain text. We have :

  • The current lock, here it is "Hands back"
  • The current energy, it seems 34.0 has become 33.7, because I have made one attempt already
  • The current target, here it is "Hands front", because I want to wriggle my hands from the back to the front
  • The current cost, it is 3 + 0 = 3 "tenths of energy per try", in other words 0.3 energy point, which explains why 34.0 became 33.7 after the first try
  • The progress done, which is a glorious 0 (and I must reach 3) with... ouch, 10% chance per try. That's steep !


So, to recap, every time I click on "Hands front" to try to wriggle my hands from the back to the front, it costs me 0.3 energy, I have 10% chance of success, and I must get 3 successes in order to get there. Dandy.

Ok, let's try my luck today. I click on "Hands front" (what choice do I have anyway ?). Nothing, I just lose energy. I click and click, still nothing. I click some more, until...


Yes ! I'm making progress now. I guess this is going to take a while and cost me, since every try has only 1/10th chance of making progress at all. And the menu warns me that if I choose another target (I can't here, since I have only one choice) or if I move, I'll lose all my progress !

So, better not move and keep wriggling. I click and click and click, and eventually...


Making progress ! But my energy is going down, I'm at 26.5 now. It's not too bad, but it would seriously complicate my attempts to struggle out, if I needed to.

I click, click, click, and finally...


Woohoo ! I successfully wriggled my hands to the front ! Depending on the situation and on how my restraints are set, this may earn me a few perks like being able to touch things, and the like. It could actually seriously change things, this is not just for show.

And the menu now switches to asking me where I want to wriggle to. I've been able to wriggle my hands from back to front, I could want to go back. Notice the energy is not replenished :


This is one very important thing about the Wriggle plugin : when you successfully wriggle to another lock, neither your energy nor the sequence of struggles to take is reset. They stay the same !

Interestingly, the costs are identical (and my energy has decreased further), but the chance is twice as high now. This is because it is actually easier to wriggle your hands from the front to the back, than the other way around, but every attempt is just as tiring.


We're almost done, as you see there is not much to know about the Wriggle plugin, but there is one additional subtlety. Just like in real life, it is easier to wriggle your hands from back to front if your legs are free or loosely tied, than if they are tightly tied together. Even more so if you're hogtied. It is possible, but much harder.

To simulate this, every Wriggle plugin communicates with the other Wriggle plugins worn by the same avatar, and every time one of them is locked, the others are told about it. Every Wriggle plugin has a list of modifiers per lock that it transmits to the other restraints, in order to find out the final cost of every attempt.

This is the "+0" part you've seen on the menu until now. When other restraints are added, the "+0" becomes "+1", "+2" etc. Let's see :

I tie my hands behind my back again, but this time with my legs tied together.


I go to the Wriggle plugin of the hands and click on "Hands front" once :


See what I mean ? The "3+0" part became "3+2", because the legs add 1 to the cost and there is one additional restraint besides the arms ropes, bumping the cost from 0.3 to 0.5 per attempt.

The actual calculation is :
Current difficulty + Highest modifier + Nb restraints - 1

"Highest modifier" being the highest of all the modifiers coming from all the other Wriggle plugins.

Now what if I chose to be hogtied ?


I go to the Wriggle plugin and check :


Oh, it bumped to +4 now ! See how much harder it would make my attempt at wriggling my hands to the front ? Not impossible, but much more tiring !


Likewise, suppose I want to lie down in this bondage (and suppose I can't just tie myself that way, for the sake of the demonstration).


Once again, if the Wriggle plugin didn't exist, I would be able to kneel, to sit down...


... but not actually lie down, because if I could I should not have any guarantee that I could get back up to my feet. That's why I need the Wriggle plugin of the legs ropes to do this.

Right now only my wrists are tied, so I click on the legs ropes and look at their plugin :


Oh, it actually looks quite easy. Cost is 2+2 and 40% chance per attempt, the "+2" part coming from the wrist rope and the fact that there are two restraints in total. Piece of cake.

Of course piece of cake, I'm just trying to get my butt down on the floor. Anyone can do that. But the other way around is trickier ! Let me try that now. I want to go to the Tight position while lying on the floor :


Ah. Yes, that's more serious indeed. Cost is 3+2 and 20% chance per attempt. Not so easy anymore, but doable.

But what if my arms were bound much more tightly ? Like, say, in "Supertight" ?


How hard do you think this would be ?


Gosh ! It costs 3+7 per attempt ! One full energy point ! And still 20% chance, it's not actually harder but much more tiring. This is because in this bondage, I have less leverage with my arms than in a simple wrist tie. Makes sense, doesn't it ?

Of course, when bound in "Supertight", I wouldn't be able to wriggle my arms to any other tie, so if you looked at the Wriggle plugin of the arms ropes, it would not give you any choice, the menu would be empty.


On a side note, you can always attempt to wriggle, even when your energy has reached zero. You just can't struggle out until you recover some energy, and your chances of wriggling are brought down to a pitiful 2% per attempt. So it is possible, but likely to take a while. And remember, you mustn't move while wriggling or you'll lose all your progress !


Also, you may have noticed that since v1.24 you are able to use the RR Anim HUD to lie down when your legs are in Taut or Hobble. This makes sense because it is rather easy to lie down and to stand up when your ankles are not bound (or loosely), and if the Wriggle plugin were necessary for this, then it would mean you'd go into the actual "Lie" lock, which shows more restraints. It would not be realistic.


So, that's pretty much it. The Wriggle plugin is present in nearly all the restraints, even gags. Yes, you read that right : gags. But only those that don't change look when changing lock. This is because sometimes you want to loosen your gag yourself, because you know you have more chance at doing it than trying to completely struggle out of it. Or the opposite : sometimes the gag is not tight enough for you ! Or maybe you are wearing two gags and your captor was sloppy and them both to "Tight" before they left for the day, making you mumble twice when you speak. When you wear more than one gag at the same time, all of them except one (at most) must be set to "Total", making it so you only mumble once, at most, per chat message. The Wriggle plugin saves you in that case.

What do you mean "let's check it out" ?

No, don't... MMMmmph !!


Have fun !

Marine

(*) For those who make plugins for the RR products, don't fret. The energy stored by the main script is still an integer, the decimal is just additional information held by Wriggle itself, the interface to the plugins does not change.

RestrainedLove 2.8.5.10 with FittedMesh support

$
0
0
Hi there,

Here is the latest version of the RLV, with a couple bug fixes, but more importantly, support for the new FittedMesh feature !

If you don't know about FittedMesh, this is a very new feature that hit the grid recently, that allows rigged mesh (mesh attachments that follow your movements) to be deformed by your shape sliders.

It doesn't spare you from having to wear alpha masks, but it does let rigged mesh fit you much more easily. That decreases the need for the common "XS", "S", "M", "L" and "XL" variations of the same rigged mesh, when it comes to clothing. I'm very enthusiastic about FittedMesh, I feel it is going to bump the clothing business a notch higher in terms of quality.

Anyway, along with FittedMesh support, the new RLV comes with the following changes :

- changed : Do not block llRegionSayTo on channel 0 even when @recvchat or @recvemote is active, because this kind of chat is very similar to a task IM (an IM from an object to an avatar), only without the built-in delay and valid only in the same sim. Thanks Felis Darwin for the report.

- fixed : RenderResolutionDivisor was broken in deferred rendering (again).

- fixed : @remoutfit=force didn't care about "nostrip" in the folder name (only in the item name). Thanks Kinki Aftermath for the report.


You can download the viewer here :
Real Restraint

And the MD5 hash for the Windows installer is :
4b692e9df50d9547a960b07e50138b77


Have fun !
Marine 

New RealRestraint product : Leather Body Harness

$
0
0
Hi !

Let me introduce you to the new RealRestraint Leather Body Harness. This mesh harness is the most classic leather body harness you can think of : one strap above the breasts, one strap below and one around the waist, as well as vertical straps that go from the back to the front, between the legs and up to the shoulders where they form a "V". We've all seen that design before :


Before you go further, please be advised that there are requirements for enjoying this harness to the fullest, both for you and for those looking at you wearing it :

It uses materials. Nowadays every viewer supports materials but not every video card does. Plus you must have Advanced Lighting Model turned on in order to see materials (even if you don't need to turn the dynamic shadows on), which tends to be heavier on your computer. If you don't see materials, the leather harness will look flat to you and you will wonder why it doesn't shine like on the pictures. But if you do, you will see some realistic-looking leather and metal here :


It uses Fitted Mesh, the latest project from Linden Lab to allow for deformable rigged mesh (i.e. rigged mesh that adapts to your shape). So you need a viewer that supports Fitted Mesh as well in order to see the two lower straps correctly. Normally every viewer is now supposed to support it, and you have nothing to activate.


In fact, only the crotch and the vertical stomach straps are rigged mesh (and as stated above, Fitted Mesh), hence they are not resizable since they are supposed to resize to your shape automatically. All the other straps are classic, non-rigged mesh so you can resize them at will. This is interesting because despite the fact that Fitted Mesh attachments are supposed to follow the shape of your avatar, in practice they often require wearing alpha layers to hide some parts of your body, because the fitting is never perfect and straight parts will clip through your skin when you bend the wrong way. This is not the case with this harness, because the amount of rigged mesh is minimal and you have full control over the rest. This allows, for example, for big mesh breasts, given a little tweaking with the upper straps.


The harness comes as 5 attachments :
- 1 crotch + stomach part to go between the legs (this part is Fitted Mesh)
- 1 waist part for just the waist (this part is classic unrigged mesh)
- 1 upper part for the whole chest (this part is classic unrigged mesh)
- 2 bonus vibrators

To resize your harness (either the waist part or the upper part), simply right-click on it and choose "Edit" :


Then tick the "Edit Linked Parts" checkbox on the edit window to allow you to select one strap at a time :


And finally click on the strap you want to resize and resize it.


Don't hesitate to rotate the vertical strap between the breasts, in case your mesh breasts are too big and clip through the upper strap, forcing you to stretch it while the lower chest strap needs not be stretched as much. Each strap is one prim only so you don't have to bother about positioning the fasteners, buckles and rings yourself, making it easy to deform your upper harness, which is the reason why it was chosen not to make that part rigged.

Every horizontal strap is symmetrical so you don't have to resize the left side and the right side independently. A good technique is to select "stretch both sides" when stretching sideways and up-down (if needed), but to deselect it when stretching forward and backward. That way you are guaranteed that the strap stays in the middle and stretch correctly.

This harness has been modeled on the standard Ruth shape so it should fit you with minimal effort. Keep in mind that you cannot resize rigged mesh, so you can't resize the two lower vertical straps (the stomach and crotch straps), but you shouldn't have to anyway. The only known possible issue is that the "Torso Muscles" slider of your shape should be at least 40 (that slider has always been bugged for the female shape under 40 anyway).


To operate the harness, simply click on any of its straps, or around the front ring on the waist strap, which is the root item of the product (the one containing all the main scripts and textures). This brings the classic RR menu because the harness itself is like a restraint, it can be locked and leashed.

To customize the harness, click on it, go to "Plugins", then "HarnessTex" :


The menu itself is rather simple. On the left side you have the parts of the harness you want to select and the textures and colors you want to apply to them, and on the right side you can choose to hide and show the sections you have selected, or choose a preset that will change the colors and patterns automatically.

The first to buttons you need to use are "Sections" and "Surfaces".

The "Sections" button allows you to select sections of the harness individually (a section is a strap, the rings and other metal parts associated to it), or groups of sections such as only the upper body, or only the lower body, or only the vertical straps or only the horizontal straps, or even the harness entirely :


The "Surfaces" button allows you to select some parts of the sections you've chosen, such as either the front of the straps, or the trim (the side of the strap), or the fasteners or the rings, or even a group of those surfaces, such as the whole strap, or all the metal stuff, or even the whole section (you don't usually want to select the whole section but only either the whole strap or the whole metal, but why not) :


After having selected some sections and some surfaces, you can act on them.

Firstly, you can hide and show the sections you have selected (the "HIDE" and "SHOW" buttons do not care about surfaces). For example, if your harness is entirely selected in the "Sections" menu and you click on "HIDE" on the main menu of the plugin, the whole harness disappears. Then if you select the upper body sections and click on "SHOW", only the upper straps will show :


This is very useful for choosing the style of your harness. For example, you could want only the vertical straps to show and not the horizontal ones, just by hiding the horizontal sections (page 2 on the "Sections" sub-menu) :


Or you could decide to remove just the strap above the breasts, if your breasts are decidedly too proud to let themselves be harnessed.


Or you could just show the lower part to make it act as a chastity belt.


You can do what you want. And you will notice that if you are leashed with the Leash plugin contained inside this harness, the chain of the leash actually moves to a ring that is visible (either the one above the breasts or the one on the waist).


Aside from simply showing and hiding parts of the harness, you can customize its look entirely. You can choose one of the built-in presets (all black, black with a red trim, white and gold, rustic...) :


Or tint the harness yourself through the Tint menu :


And if you can't find the color that you want, you may just specify it yourself with the "CUSTOM" button. Simply write the color in RGB format (either from 0.0 to 1.0 for all three colors, or from 0 to 255 like in the SL color editor), then click on "Submit". For example, if you want a teal tint on the upper straps :


Moreover, you can choose any of the available patterns in the "Patterns" menu, or even make your own and distribute it.


For example :

Moo.


Urban camo. Because you never know, a girl must be prepared for war.


Studs, for that medieval look.


Skulls, for that even more hardcore medieval-gothic-punk look.


Little hearts. Not so medieval or gothic, but a lot cuter.


Who said leather harnesses are for subs only ?


Some of these patterns come in two versions : white on black (written "W&B") and black on white (written "B&W"). Be aware, though, that tinting the straps will tint the patterns as well, in other words it will add some color to the whole texture. It does not cause any issue with black (tinting black will still give you black) nor with white (tinting white will give you your tint exactly), but tinting a different color is problematic because they mix : if you tint a red texture with a blue tint, you end up with some violet.

That's why most of the provided patterns are either black, white, or both, and you can't have two colors on any face unless one of them is black. If you want more than black plus a tint, you need to make the texture yourself and tint it white.


If you have some basic knowledge on how to make and import textures into SL, and if you are interested in making your own patterns, read on. Otherwise, jump to the last paragraph of this post.

The textures contained inside the harness (the waist part, which is the root item of the product) are full-perms so they can serve as examples for your own, but you are also provided two base leather textures (black and white) and the UV map of the straps :


This texture is a sort of template that indicates how the whole image is "wrapped" around the strap.

As you can see, the UV map is simple... just write or draw what you want in the middle of the texture, between the two horizontal lines. The two strips above and below it represent the trim.

There is a thing to know, though. You might have noticed that the horizontal and vertical straps may or may not share the same pattern (that depends on the pattern). For example, the pattern "I command W&B" will display "I COMMAND" on the horizontal straps and "YOU OBEY" on the vertical ones :


This is because the pattern "I command W&B" is in fact composed of two textures : "I command W&B" and "I command W&B V".


Notice the letters are rotated 90° to the right on the second texture. This is what you will have to do too if you want your textures to be different when the straps are horizontal or vertical : simply name them exactly the same, but add a space and a capital "V" at the end of the vertical one. Also make sure the name does not go beyond 23 characters, which is the limit for a button on the menu.

Once your textures are done, drop them inside the waist harness. No need to reset, it will reset itself and rebuild its lists right away. Be advised that the textures need to be full-perms as well, or they won't be used by the plugin.


Lastly, the box contains a little bonus... two dildos ! They are an evolution from the ones contained in the Siren ropes box. They vibrate, change color, make sound and get locked along with the harness, but they're also much bigger, they have bubs and they...

... hmm...

... well, I can't tell you. It would not be, you know, proper.


You can find the RR Leather Body Harness in any of the RealRestraint vendors, it is Modify, No-copy and Transfer, and costs L$450 :


Have fun !

Marine

PS : The collar, mesh breasts, weapon, nipple and pussy pasties are not included.

Small fixes to the Leather Body Harness

$
0
0
Hello there,

I've got a few reports about three silly bugs since the release of the Leather Body Harness...

Bug 1 : Two of the three parts are detachable even while locked and under a RLV : That bug is due to me going too fast when installing the Leash plugin (it was installed very late in the design, I initially didn't mean to even make the harness lockable in the first place, let alone leashable), the Leash_slave scripts were put in root prims... I should have known better because they tend to clear the RLV restrictions issued by the prims they are in. To fix that, you need to update at any of my updaters because the updated harness contains two additional invisible prims for those leashes.

Bug 2 : When you modify the color of the rings (not of the fasteners), it will also modify the color of the fasteners of the vertical strap between the breasts, and the one behind the back. This is due to a missing value in the Description field of these two straps and you can fix it yourself easily (see below for the procedure).

Bug 3 : The "Give Tools" button on the Leash plugin does nothing at all... Of course, because I have forgotten to add said "tools" to the harness, namely a leash handle and a leash pointer HUD.


The fix to the first one requires an update (if it really bothers you) but the other two do not.

Here is how to fix Bug nbr 2 :

- Edit your upper torso harness, select "Edit linked parts" and click on the front strap between your breasts :


- Look at the "Description" field on the "General" tab, it should show "harnesstex,verticals,F120" :


- Add a "3" after that text, making it "harnesstex,verticals,F1203". Don't change anything else :


- Click on the vertical upper back strap and repeat this procedure :


 - Once done, close the Edit window and it should work, without even needing a reset.


To fix Bug nbr 3, you need to be part of the RealRestraint Updates & Support group and read the notice about the bug and its fix, because it contains the two missing objects (a leash handle and a HUD).

- Locate those two items in your own inventory, they come from the notice to the group but they are identical in each RR product so you can as well take them from any of your other restraints by going to "Plugins", "Leash" then clicking on "Give Tools" :


- Edit the waist part of your harness, without clicking on "Edit linked parts" this time :


- Go to its "Content" tab, the tab that displays the contents of the waist harness, and drag-and-drop those two items inside :


- Once done, close the Edit window. No need to reset.


If you're uncomfortable with editing prims and description fields and inventories and all that, you can just go to one of the updaters and request an update at any of these locations :


My little shop : http://maps.secondlife.com/secondlife/Pak/76/61/105

The Little Shop of Kink : http://maps.secondlife.com/secondlife/Lineside/102/146/77

S&M Castle : http://maps.secondlife.com/secondlife/Free%20Bird/38/149/39


Once again, I'm sorry for the inconvenience !

Marine


News from Sugar

$
0
0
Hi !

I've kept pretty silent on the matter lately, but it has been wearing on me for sure... My friend and partner Ollalla Sugarbeet has been missing for months. Her last login in SL was on December the 23rd last year.

She's alright. Almost. I can't of course get into specifics, especially on a blog, but she would like to reassure people and her friends.

She has fallen very sick something like 6 months ago, rather suddenly, the causes are unknown. Probably a conjunction of factors, because her RL was quite rough at the time, so I suspect stress must have aggravated it. She's been sick to the point of being hospitalized... and she's still in the hospital today, 6 months later. She's slowly getting better over time, but it seems what she caught is something tough to battle against.

Anyway, she wants her friends to know that she misses them, she misses SL, and she is impatient to come back. She just doesn't know when she will be back. It could be weeks or months from now. She has a very limited access to the internet, and of course can't log on into SL from where she is.

If you have rented her a spot for an RR vendor, she knows it must be overdue. Please contact me directly so I can pay her rent for her, thank you.

Marine

Good news about Sugar

$
0
0
Hi there,

I'm sorry for the silence lately, I've been VERY busy with my latest SL project, you'll know more in a few days when I release it. That will be my biggest product for the time being and the feedback has been very positive so far.

But this is not why I'm writing this blog post. I am writing this blog post to reassure you about Sugar (my partner), who has been hospitalized for months. She's out of the hospital now and her health is improving. She needs time to get her life back (you can imagine that after having been removed from the world for eight months, your everyday life must be a mess), but she's out of the woods now. I know it doesn't sound like much written on a web page like this but believe me, she's been through the toughest times, and she made it alive. Although she didn't comment on the subject, I have a hunch that "making it through alive" was not at all to be taken for granted for quite a while.

She misses you all, and she thanks you for having thought of her and for your support. She will be back when she can, probably not much at first of course, but I suppose gradually more and more. Who knows, one might even think her SL will be back to normal one day. Is it too much to hope for ? Maybe not. If someone can do it, she can.

Marine

New release : Pretty Mummy

$
0
0
Hello there,

I'm back after nearly two months of silence, having been busy working on my latest and biggest product : the Pretty Mummy set. This blog post is meant to demonstrate it fully, both as a manual and as a tutorial, but it's not for the faint of heart : it's long and there are over 130 pictures in there ! Most of them being full-screen snapshots with no photoshopping done to any of them, all the pictures have been taken in-world with materials and shadows enabled, so what you see here is what you get.

This is a full-body mummification set that allows the dom/me to completely wrap the sub in fabric, latex, tape or saran wrap. Of any color, any transparency, even sheer or clear, and any style. You can choose to wrap the parts of the body you want and to leave the rest uncovered, or to cover it completely.

It is the biggest product in the RealRestraint brand so far, because it is comprised of four different and mostly independent restraints : the top parts to restrain the arms, the bottom parts to restrain the legs and cover the body (it is a mummification set after all), the gag for the mouth and the ears, and the blindfold for the eyes and the top of the head. All together, these restraints let you restrain your sub pretty tightly (the restraints are very difficult to struggle out from) and let you fashion her bondage the way you want.

See for yourself !

A nice and quiet mummy getting a well-deserved rest in warm wrappings


Or in lighter fabric...


... like nylon


Taped


Or in latex


Encased in latex from head to toe


Even clear latex


Or saran wrap


In tape again...


And making a nice decoration !


As you can see, the textures are very finely designed, the poses are sexy and tight, the possibilities are... many.


Before you go further, if you intend to buy this product, be advised that it requires your viewer to be able to handle two things : Fitted Mesh and Materials. Without either of these features supported by your viewer, it will look at best flat, at worst like a mess of vertices. You really need your viewer to support both features in order to enjoy the product to its fullest. Same for the people who are looking at it.

Half of the set is made of Fitted Mesh objects. Fitted Mesh is a special kind of rigged mesh (mesh attachments that articulate like the part of the body they are attached to, like dresses, pants or jackets) that is deformed more or less like the shape sliders of your avatar. That is to say, if your avatar has big breasts, the breast part of the object will be bigger as well. Fitted Mesh works better than standard rigged mesh but it is is not ideal, so the avatar shape has to stay within some parameters (which I will detail later in this post) to avoid "clipping", i.e. having your skin show through the material.

It has been mentioned that the mummy set could be transparent... This is actually one of its main features. Being Fitted Mesh and being built the way it is, it allows the sub to be completely encased into sheer fabric, clear plastic, nylon, transparent duct tape, you name it. The effect is great and very realistic.

If you don't want to modify your shape in order to fit in the Pretty Mummy set, and you don't really care about being encased in transparent fabric, you can use some of the alpha layers provided along with the product, that will remove all clipping by hiding some parts of the skin of your avatar.


What's in the box ?

The box contains a lot of things, in fact. You will find :

- Four main items : They contain all the core scripts and plugins, and they look like simple spheres or eggs. Each main item makes one of the parts of the set work : "top" for the top parts, "bottom" for the bottom parts, "gag" for the mouth and "blindfold" for the eyes. Each one of them is an individual restraint and is independent in terms of completeness : the sub can, for example, wear just the gag part (along with the variant she wants, see below) and use it all by itself, without needing to wear the arms, legs and blindfold parts along with it.

- Several items marked "wrap", two of them having "rigged" in their name. All these items are controlled by one of the four main items, and are in charge of actually making the bondage visual. They are the ones bearing the textures, the sounds, the color and the actual shape of the bondage. All of them are objects containing at least two prims, their root prim being a simple sphere hidden inside the body of the avatar, the rest being mesh objects. They are all invisible until locked.

- Three boxes marked "variant", containing the equivalent of the "wrap" items described above, but with different materials : tape, latex and plastic. They are meant to be rezzed on the ground and to be opened, and their contents to be moved to the inventory and used just like the "wrap" variant. Of course, the sub does not wear different variants of the same object, but she can wear different objects from several variants, such as a tape gag along with latex body restraints. That's not a problem at all and it will work seamlessly.

- A box containing Pussy and nipple tape pasties : These are unrigged mesh attachments, they will change color along with the rest thanks to the "MummyTex" plugin, but they are a bonus, they are absolutely not necessary for the product to work. It's just, well, you can always have use for more tape, right ? By the way you get two copies of each, so you can use one as a backup.

- Several gestures : The "Feet" gestures are used to force the feet either straight or bent, while the "Toggle breasts" gesture allows the sub to switch between the classic and the rigged version of the breasts cover.

- Twelve optional alpha layers : This is a "just in case" bonus. If the sub's avatar clips through the fabric and she doesn't want to change her shape and doesn't care about the transparency, those alpha layers can help. But if her shape fits in, those alpha layers should not be worn. Along with the alpha layers are provided the source textures, all full-perms.

- RR Anim HUD : This HUD is to be worn by the sub to help her control her pose when she's bound (see http://realrestraint.blogspot.com/2014/02/rr-tutorial-anim-plugin-v3.html for details).

- Notecards and a landmark to my main shop, where you can find an updater when needed.


The restraints

The Pretty Mummy set is divided in four parts, plus a few bonuses.

* The upper part (top, arms and hands)

This restraint is made to cover the top part of the body and to restrain the arms. From classic tape bondage to industrial shrink plastic, you have all you need to make sure your sub's arms are kept snugly out of the way, and her upper body is elegantly shaped. Here are the ties demonstrated with the tape variant :


 Elbows only, she can still use her hands for many purposes (except getting out).

 Elbows and forearms, for a tight bondage.

 Armbinder, a tighter and more secure version of the above.

Pony, when you need those arms in check, and the pose proper.

 Straitjacket front, now we're talking.

 Straitjacket back. Has she been naughty ? Good luck getting out of that !

Mummy front. The arms are taped tightly against the body.

Mummy back. The arms are pinned against the back.


It also controls the visibility of the breasts through its "Style" plugin, allowing you to either cover the breasts or let them show.


Here you see the chest part hiding the breasts. You can hide and show that part thanks to the "Style" plugin contained in the arms restraints :


It says "Sorry, no style is available for this lock" (which is true, in this tie, named "SJ back", there is no predefined list of styles), but you can still click on "Breasts" to deactivate it. Then here is what happens :


You can also cover the hands to prevent her from touching stuff around (or people around, or even herself), thanks to its "Cover hands" plugin. This can be configured, you can allow her to touch the world but not other people, for example.


With her hands unwrapped, the sub can touch. But if the dom/me goes to the "Cover hands" plugin and clicks on "Wrap"...


Now she can't touch anything anymore.


* The lower part (bottom, legs and feet)

This part is for the legs, but also for the body and the overall fashion. It is the part that provides the most cover, because it goes all the way from the toes to the neck.


 A simple hobble tie. But you'll see later that it can take some other interesting shapes.

Moar tape. You can always use moar tape. There is a "Lying" version of it too.


"Pet". Now this is original : it forces the arms into "Pony" and makes the sub crawl on all fours. More about this tie later on in this post.

Hogtie. Or should I have called it "nice package" ?

Frogtie. When you want her legs in check, and her pose proper.

 And finally "Mummy" (and its sibling "Mummy lie", the same but on the floor), it covers the whole body in one single loop of tape ! The whole roll, actually.


You can even cover her feet to prevent her from removing her shoes. And depending on the shoes she's wearing (if any), there should be an appropriate shape in the "Cover feet" plugin to cover them nicely :


For example, here I am wearing high Slink feet with heels. I must select "Slink high" on the "Cover feet" menu to make sure I will use the right shape...


... then click on "Wrap" to make it show and activate the restrictions :


And the feet are covered all the way down (or almost) :


You noticed there were "Short", "Medium" and "Long" versions. This was the long version, here are the other two :

"Short" : it covers only the ankles.


"Medium" : it covers half of the feet.


This plugin should cover most common prim shoes such as Slink (flat, medium and high), N-core, Skifija, and of course the default system feet.

Be advised that the feet won't be covered on certain ties, such as those that don't hold the legs together ("Hobble", "Pet" and "Frogtie").


* The gag

This gag looks like the standalone RR Tape Gag, but is even more covering :

"Loose" : only the stuffing is showing. Is that panties in your mouth or are you happy to see me ?

"Medium", in case the stuffing is too much for her to bear, and she needs help keeping it in.

"Tight", in case some sound still comes through all that tape.

"Total", total silence. At last.


It even has an option to cover the ears as well, thanks to its "Cover ears" plugin, turning it into an isolation restraint because when her ears are covered, she won't hear chat or IMs anymore. Like the hands, this can be configured (you can make her able to receive IMs but not hear chat, for example).


When the tape is transparent, you can see small pads of cloth against the ears.

You can also add a couple more strips of fabric to cover her nose and the back of her head, to close the gap between the gag and the blindfold :

What do you say ? "How does she breathe ?" Well, there are tiny holes under the nose, but you don't see them. She just has to breathe slowly, that's all.


* The blindfold

Finally, tie the blindfold over her eyes to make sure she is in total isolation :


"Blurry" to "Thin". You don't see them here, but there are little pads of cloth before the eyes (you can see them when the blindfold is transparent). You can see them on other pictures on this post.


 "Medium" to "Opaque", but also the simple "Tie", which doesn't blind.


You can even go as far as covering the top of her head and make sure she is fully encased, with not one inch of skin showing underneath !


This makes a fine hood when the blindfold and the gags are both tied to the maximum, with the ears covered :

 Mmmph ?

 MMMPH !!

 
 All taped up and ready to go !


* One special tie : "Pet"

The "Pet" tie in the bottom part is a bit special : not only will it tie the sub's legs into a frogtie, but it will also tie her arms into their "pony" tie (i.e. arms folded tightly), even if they were already tied. This double tie forces her on all four like an animal, it is very humiliating !


 She can crawl, even run like that (or really, crawl faster), but she can also be cute and sassy :


Have her restricted properly with her hands covered, her mouth gagged and you're guaranteed to give her a humiliating, dehumanizing experience. She will love it !


Changing position

Almost all the ties in this product allow the sub to change her position to an extent. For example, if her arms are tied behind her back, she can move them further back, closer to the body, or even fold them or hold them in a strappado. Likewise, if she is bound standing, she can kneel and sit down. She can also control the angle at which her legs are tied, when she is sitting on an object.

All this is done through the use of the Anim plugin and its HUD

And even when she's tied up standing straight, the sub is able to wriggle her way down to the ground so she can lie, and the other way around. Although the restraints are tight, they are comfortable, so it is difficult but not tiring. She can do this thanks to the "Wriggle" plugin, which allows her to switch from one tie to another almost at will. In short, she goes to the "Wriggle" plugin, presses the button corresponding to the pose she wants to switch to (from standing to lying or from lying to standing), repeatedly, until she succeeds. It just requires time and total stillness to do so.


Functionality

Like every other RealRestraint product, this set is filled with additional plugins, to bring more features to the restraint, especially RLV support. For example, the "Control" plugin allows the dom/me to restrict the sub while she's tied (inventory, map, names, build...), while the "Touch" plugin allows the dom/me to restrict the sub's ability to touch. My favorite configuration is "don't touch other avatars, don't touch far, don't touch self, but allow touching world. As explained above, the "Cover" plugin of the arms part also imposes its own touch restrictions. Finally, the "Outfit/Wear/Unwear" plugins allow the dom/me to control what the sub can wear.

All those plugins are pretty standard in the RR brand, and there are comprehensive tutorials for each one of them here : http://realrestraint.blogspot.fr/2009/08/realrestraint-tutorials-tips-tricks.html


Be advised that this set of restraints does NOT include a "Leash" plugin, a "RealKey" plugin or a "Give Keys" plugin, since it does not have keys nor any solid part that a leash could anchor to. It would not be believable to add such a feature to it. Mummies are carried and stored, not dragged on a leash, right ? And although the "Pet" tie could use a leash, since this product does not include a collar, I expect the sub to be leashed by her collar, whatever model and brand it may be (RR or not).


Fashion

The main purpose of these restraints, beyond actually restraining a girl, is to make her look pretty (as the name of this product implies). So there's a ton of customizations available to you, brought to you in the form of three plugins : "Cover hands/feet/ears", "Style" and "MummyTex".

You have already seen the "Cover" plugins in action : they are meant to cover the extremities such as the hands, the feet or the ears, depending on the restraint, and will restrict the sub accordingly.


* "Style" plugin

The "Style" plugin is meant to hide and show some parts of the restraints as well, but this time without any additional restriction, just for fashion. For example when the arms are tied in the "Arms tight" pose, or the legs tied in "Legs tight" pose, you may want to let all the wrapping show, or divide each part in two strips or even in three strips :


Arms set to "Full" and legs set to "4 strips"


Arms set to "Full" and legs set to "6 strips"


Arms set to "Full" and legs set to "2+1 strips"


 Arms and legs set to "6 strips"

Thanks to the same plugin, you can even turn the "Hobble" tie into a hobble dress :


Likewise, the top part of the restraint lets you hide and show the breasts. Because you may want to have her snugly tied up under many layers of tape, but still have access to her gorgeous breasts to tease them, right ?


If you choose to just tie the bottom part without a pose (by clicking on the "Tie" button), the restraint will look like a tight dress.


And a sexy one at that, especially with the Latex variant


Then, use the "Style" plugin to select the parts you want to show and hide :


Halter

Ensemble

 Fetish

 Top only

 Stomach only

Skirt only

... no need to show what "Nothing" means.

How sexy can you make her ?


On a side note, the box contains a few gestures that allow to switch the breast part between rigged and unrigged. When the rigged part is visible, it should follow the shape of the breasts of the sub's avatar, but if she's wearing mesh breasts, chances are this won't be enough and they will clip through. That's why the top part of the restraints contains an unrigged part for the breasts, that can be resized at will. Don't forget to check "Edit Linked Parts" on the Edit window before doing so :


The box contains a gesture, "Toggle breasts", that allows the sub to toggle between rigged and unrigged breasts at will by pressing Shift+F10, but all that it does is make her say "togglebreasts" on chanel 1144. Of course, the gesture is full-perms so she can change the shortcut to whatever she wants. The same result can be achieved by saying "/1144 togglebreasts" (without the quotes). She can also say "/1144 classicbreasts" to make the unrigged breasts show, or "/1144 riggedbreasts" to hide the unrigged breasts and show the rigged ones instead.

Each restraint has its own styles, and they are different when you tie them differently. That's a lot of customization for you, and that's only the hiding and showing part of it.


* "MummyTex" plugin

To actually change the color and the opacity of these restraints, you need to use the "MummyTex" plugin. Its layout is very much like the "HarnessTex" in the RR Body Harness and lets you select the part of the restraint you want and its surfaces, and to choose a color and a transparency. Each one of the four "MummyTex" do exactly the same thing and have the ability to modify the whole body, so you don't have to customize four times. The "Cover" and "Style" plugins are pretty simple (as a reminder, "Cover" will add restrictions, "Style" will not), but the "MummyTex" plugin could deserve its own tutorial page. Maybe there will be one later. Feel free to experiment with it, you won't break anything.


Just know that "sections" means what objects you want to modify, while "surfaces" means what parts of those objects you want to modify.


 Sections

Surfaces

There are fun things you can do with the "MummyTex" plugin by playing with the sections and the surfaces. For example, you could tint every strip of tape differently while your sub is in the "Arms tight" and "Legs tight" position :


All it took was a change of tint on every single surface (edge, inter, middle...) and choosing a different tint each time. Think you can make your own flag ?


Now, let's try something else. Suppose you want to tint the whole body black, after covering your sub from head to toe. You go to the "MummyTex" plugin of any of the four restraints (gag, blindfold, arms or legs), you select "PRESETS..." and you choose "All black".


But if you want more control, for example if you want her legs and her head to be tinted in a color that looks like skin, you just select the "Head" section (that's equivalent to "eyes" and "mouth" combined) with "ALL" surfaces, and select the "Flesh pink" tint. Then, you select the "bottom" section, the "Lower" surfaces and select the "Flesh pink" tint again and voila !


Looking through the window... there's someone inside, but who could tell...

... that's she's in a bit of a bind ?

She looks like she's dressed for the party, doesn't she ? Seen from afar that is. Because on a closer look, she's tied up really tight. 


By the way, how fun would it be to actually paint eyes and lips on her blindfold and gag while she's like this ? To make her look even more casual, you know ?

 
And now ?

 Ok the disguise may not be perfect, but it's good enough to fool the casual bystander !


* "Very funny" plugin

You can actually do that with the two "Very funny" plugins located in the gag and in the blindfold. "Very funny", that's what she will say when you use it on her. Or rather, that's what she would try to say. Chances are it would come out as "mmmmph" instead.

Both "Very funny" plugins are totally independent, and both work more or less like the "MummyTex" plugins explained above, but simpler. You can select a texture and a tint and decide to let it show or to hide it (it is hidden by default). Among these textures you can find :

- Anime drawings (starting with "Ani" in the menu) : pretty, happy, confused, dreaming, kissing, yelling, grinning...


- Japanese emoticons (starting with "Smi" in the menu) : disgusted, confused, happy, dead...


- Handwriting (starting with "Wri" in the menu) : the eyes and the mouth have different textures too, and they are chosen so you can make combinations easily :


My favorite is the pretty eyes with lips over flesh-tinted gag and blindfold, with hair. That way, a casual glance will not reveal the girl to be helplessly bound, while walking her in the street. Kinky !

But you know what ? You can make your own textures as well and paint them over the gag and/or the blindfold without even having to give it to the sub (although that works too, all she has to do is to put it inside the gag or blindfold, it just has to be full-perms).

To do this, make your texture in Photoshop, Gimp, Inkscape, Paint or any graphics program, export it as a texture and import it in SL. Good formats for the texture would be 512x300 for the eyes and 512x410 for the mouth. Once imported in SL, right click on it in your inventory and select "Copy Asset UUID" (meaning, copy its unique SL identifier, a 36 character long piece of data, to your clipboard), and paste the content of the clipboard in the text box you get when you select "CUSTOM" in the "Pattern" menu of the "Very funny" plugin.

Please be advised that to avoid alpha sorting issues (a graphical glitch that occurs when you stack several transparent textures on top of each other), the alpha mode of the two prims used to display the paintings are set to "alpha masking", which means that each pixel of the texture will be either completely transparent or completely opaque, but nothing in between. Keep that in mind when you design your own texture, don't do elaborate transparency or anti-aliasing, it wouldn't look like you would expect. Keep it simple, it's just supposed to be a painting made by hand anyway.


Materials

The box contains all that is necessary to wrap up the sub in tight cloth. I mean, it's a mummification set, right ? In fact you could wrap her into anything if you wanted, so the box contains three additional variants : tape (as in duct tape), latex (excellent for fetish sessions) and shrink plastic (that's my favorite, it's so tight !). All those variants behave exactly the same way, they are just using different materials : shrink plastic and latex have a high gloss (but the shrink plastic variant is all stretched while the latex is perfectly smooth) while tape shines somewhat less and wraps barely shine at all (only the outer fibers have a little shine, to simulate the wear on the fabric). Their sounds are also different, of course.

Depending on the variant, if you make the restraint semi-transparent, you will either see overlapping strips or not. It makes sense : wrap and tape are actually very long strands of fabric wrapped around the sub's body, so the strips will overlap, making the restraint less transparent where they do. It makes for a much more realistic feeling, and allows for example to render nylon. Simply make her wear the "wrap" variant and have her completely covered, then choose a translucent or transparent opacity and a gunmetal or a brown color for the whole body. And voila, you have her trapped in a full-body nylon bondage :


Latex and plastic, on the other hand, are supposed to be painted or sprayed, or whatever you can think of, directly on the body, making for a big single thick layer of material that is stretched to the max to keep her restrained tightly, and that is resilient enough to withstand the sub's struggling, and even puncturing. In consequence, there is no overlap, even when you make it half transparent. The effect is different, somewhat more futuristic, and certainly more fetish :


I would have made a plugin to let you change the variant yourself (and provided more textures probably), unfortunately Linden Lab did not provide us scripters with a way to modify the materials through a script. Maybe when we're able to, I will merge all those variants into one, and make such a plugin to switch between them.


These variants are the reason why the main objects (the ones containing all the main scripts) are actually just invisible spheres, while the restraints are separate objects. That way, these objects can be replaced painlessly without losing or duplicating any feature, and can even be mixed.

Oh, I've heard that materials tend to slow the computer down... that's not entirely true actually. There is an option on the viewer to activate what is called "Advanced Lighting Model", which completely changes the way the world is rendered. When it is turned on, it activates the dynamic shadows as well, and that's what slows your computer down. But you can see materials without having to suffer dynamic shadows, if you want.

To do this, go to your Graphics panel of your Preferences window, activate "Advanced Lighting Model" if not already done :


Then turn "Shadows" off, where it probably said "Sun/Moon + Projectors" (meaning in plain English, "render shadows from the sun and the moon, and shadows from local artificial lights set as projectors") :


Et voilà, you can now see materials and the shadows won't show, and your computer will be happy.


Fitted Mesh

As indicated above, part of the restraints are made of Fitted Mesh objects. Fitted Mesh is made to follow the deformation of the avatar shape, but it is not perfect (the reason for it is technical : the data available to the Fitted Mesh object is simply a size, while the data available to the avatar is a complete shape, with vertices positions and all, so both are bound to deform themselves differently, but the approximation is good enough for most mesh clothing, provided the avatar wears an alpha layer that hides parts of the skin).

You have noticed that this product allows you to make the restraint partially transparent, forbidding the use of an alpha layer (or the holes in the avatar would show under the fabric).

This means that the skin could clip through the restraint if some of the sub's shape sliders are too extreme. I have done all that I could to keep that from happening, but it might be that the sub needs to modify her shape slightly to avoid some clipping when bending or twisting her body.

In practice, the shape sliders to keep an eye on, and the acceptable values for them, are the following :

Torso :

- Torso Muscles : Make it 40 or more. I recommend 50, that way you won't get clipping around the elbows when bending them.
- Breasts Size : Something between 50 and 80. Under 50 the fabric will be "sucked" inside the body.
- Love Handles : Not above 50.
- Belly Size : Keep it over 5 and under 30. The body is supposed to be compressed anyway.

Legs :

- Legs Muscles : Make it 60 or more. It sounds like a lot, but it is not really. Anything under 50 will look very skinny. Like "Breasts Size", the fabric tends to be sucked in when set to lower than that.
- Butt Size : No more than 65. Same remark than Belly Size.
- Saddle Bags : Between 20 and 40 is good.
- Knee Angle : Make sure it is around 50 because Fitted Mesh does not deform well at all on this slider.

The rest can be what you want.

If you don't want to modify your shape and you don't really care for semi-transparent fabric, you can wear any of the alpha layers provided in the box as a backup, but you shouldn't need any of them if your shape is within the parameters mentioned above.


Resizing the unrigged mesh parts

The other half of the objects are not rigged, meaning they can be resized manually. These objects are invisible while unlocked, but they can be seen by pressing Ctrl+Alt+T (they appear in red on the body) if you want. You don't need to here, though, it's just to give you an idea of what they all look like.

They are organized in several multi-prim (or should I say mesh) objects so the number of attachments is kept minimal. But that's still 8 attachments : eyes, mouth, left and right upper arms, right forearm, left and right thighs and right ankle. All those objects contain a few mesh objects that must be resized individually. But don't worry, it's not difficult nor too long. Oh, the rigged top part also contains an unrigged mesh prim to resize : the chest piece.

Firstly, tie yourself up in one of the locks, for example "Arms tight" for the arms, and "Tight" for the legs.

Right-click on one of the attachments that appear and select Edit. For example here, the upper arms :


Notice that it actually highlights the whole attachment, and not only the object that shows. You want to resize only one object at a time, unless you're okay with resizing only proportionally.

Tick the "Edit Linked Parts" checkbox on the edit window :


Now click on the object you want to resize and resize it. Having "Edit Linked Parts" checked means "select only one prim in this object" (or in our case, one mesh). To resize, simply hold Ctrl and Shift down at the same time and the resize boxes appear :


Since you have selected only one "prim" (more like mesh, but let's call it a prim here), you are able to resize it not only proportionally (with the white boxes), but also in any individual direction, either symmetrically (if "Stretch Both Sides" is checked) or not.

Once done, switch to the next object that is visible, and once you have done them all choose another lock and do the same with the rest. There are not so many objects to resize, something like 10 (2 pony, 2 frogtie, 2 arms, 2 legs, 1 hogtie and the unrigged breasts), but they are all placed and rotated correctly already, so all the sub has to do is to resize them the way she wants, it takes little time each.

After you've done all that, you might be wondering "What about the other three variants ? Do I have to resize them all the same way ? That makes forty objects to resize !". Don't panic, there is a plugin that will handle it for you.

Click on your blindfold and go to the "Shape" plugin. In fact this plugin could have been put in any of the main items of the product, but I chose to put it in the blindfold because that item is the one containing the fewest plugins of the whole product.

On the menu that shows, press "Save", wait for a few seconds, the plugin should tell you every time an object has had its positioning stored (a positioning is a location, a rotation and a scale at the same time).

Then unwear all the items except the ones marked as "MAIN", and wear the next variant you want. Still in the "Shape" plugin contained in the blindfold, press "Load" and wait a few seconds, the objects contained in this variant should take the exact shapes you've just set manually. Then do this on the remaining two variants if you want, and voila, all your manual resizing has been copied over to the other sets.


Bonus : Nipple and Pussy pasties

A set of tape restraints wouldn't be complete without the appropriate nipple pasties and pussy cover to match, right ? This box contains both, and both are unrigged mesh so they can be resized at will. You can change their color and transparency (even if they're supposed to cover the sub's private areas, you may want them to be slightly transparent !) through any "MummyTex" plugin. You can set their color and opacity manually with the "Intimates" (that's nipples and pussy at the same time) or "Pussy" (only the pussy part is selected then) sections. Attention, they are not included in the "ALL" settings for the "Sections" menu, they have to be tinted separately. It makes sense because they are not really restraints, so they are not part of the rest of the wrapping.


Like the other unrigged parts of the set, the nipple and pussy tape parts can be resized with the "Edit Linked Parts" checkbox selected. And both nipples are independent, you can scale, turn and move both of them one by one so they will fit any shape of breasts, mesh or not.


The nipple tapes are designed in a way that their local axes are the most natural possible : X and Y along both tape strips, and Z being the thickness. That way you can position and resize the tapes naturally.


Be advised that due to alpha sorting concerns, the "Alpha Mode" value of the nipple and pussy tapes is set to "None", meaning they won't be transparent even if you choose a non-opaque value in Opacity in any of the MummyTex plugins. That's not a problem and is even desirable, in my opinion.


But if you really want them to become transparent on demand (they are supposed to hide the private parts, but why not), have the sub edit them and set their "Alpha Mode" to "Alpha blending" in the Edit window, Texture tab :


But if she does that, probably a transparent fabric will actually hide them altogether since they are underneath. That's due to the infamous alpha sorting rendering bug, that is not a problem only in SL.

Actually, the box contains two copies of the nipple tapes. One is resized for average breasts, while the other is resized for big mesh or sculpt breasts such as Lolas or Lush, but both are identical and they can both be resized the same. It's just so that, since they are no-copy, the sub can keep a version for system breasts, and the other for bigger mesh breasts. Same for the pussy tape, in case the sub wears Phat Azz or such body mesh parts.

Version 1, fit for medium-sized system breasts


Version 2, fit for Lolas Tango, rather on the big side (but you can resize them)

Oh, you might wonder why I didn't make an applier for the Lolas. Simply for the same reason I had to make four sets instead of one : you can't change the materials through a script and I really want the nipple tapes to shine like the rest. It is impossible to do that through an applier, at the time of this writing. And it would have been unfair to those who don't wear mesh breasts anyway.


Other bonuses : Bows, Gestures, Alpha layers

The box contains another box, which holds 12 optional alpha layers. Normally, since the product is made of Fitted Mesh objects, it should fit MOST shapes without modification. But as explained above, the sub's shape must remain within some normal parameters so some shapes are bound to clip through the fabric of the restraint. In that case, simply wear the appropriate alpha layers, knowing that SL has a limit of 5 alpha layers that can be worn at the same time.

Also the "Wrap" variant (which looks like gauze or such fabric) includes four cute bows to make your mummy even prettier :) You can see them on some of the pictures above.

Finally, the box contains three gestures called "Feet" and one to stop them, which allow the sub to force her feet either straight or bent, because some poses may bend her feet oddly if she is wearing rigged mesh feet.


You can find the RR Pretty Mummy in any of the RealRestraint vendors, it is Modify, No-copy and Transfer, and costs L$1250 :


Have fun !

Marine


PS : The clothes, hair, shoes, mesh breasts and mesh feet are not included.

Upcoming RLV 2.9

$
0
0
Hiya,

This is just a heads-up, I am currently working on a few new commands for the RLV (I know, it's been a while, right ?), specifically aimed at handling the camera and the view range. It doesn't sound very glamour said like this, but here is what these commands can do :

- You can restrict the camera within a sphere around the head of the avatar, and if you restrict the distance to zero, it forces the view to Mouselook, without any way to get out of it until the restriction is lifted.

- You can also prevent the camera from going under a certain distance of the avatar's head. It prevents from going into Mouselook as well.

- You can specify a view range... that alone deserves some explanation. It has nothing to do with the draw range of the viewer, which lets you decide how far the objects rez. Here, it "simply" draws a hollow sphere around your avatar's head, at a specified radius, with a specified color and more importantly, a specified alpha. The camera is automatically restricted within that sphere so that your avatar looks normal to you, but the rest of the world may look darkened (or completely hidden). Even better, it can draw a gradient of spheres going from the specified alpha at a specified range, up to 1 at another specified (higher) range. The effect is good enough to simulate gradual darkness or fog. It does not look as good as Windlight fog, of course, but at least that simulated fog is centered on the avatar, not on the camera (but nothing keeps you from using fog on top of it, of course).

These features are great for blindfolds, with or without a gradient of darkness, because you can't see anything around you but you have heightened senses about your own body. I never really liked to obstruct the HUD with a prim to simulate blindness, since SL is mostly a visual world, take out the visuals and it becomes a lot less interesting. So now you will be able to make blindfolds that obstruct the world but not your avatar and not the immediate vicinity (for example the chair you are sitting on, or the bed you are laying on, or the wall you are trying to follow). Couple that with a clever use of RenderResolutionDivisor and/or Windlight parameters, and you can make some nice effects.

The camera and view restrictions are also great for mazes, or overall keeping the avatar from camming around. I know it is already possible through a script, but at the expense of a fast timer, hence a lot of lag for a single feature. Plus, a script would never be able to catch up quickly enough when you go outside the allowed range, so you can see things you are not supposed to see for a short moment. With the RLV handling that internally, the camera simply cannot move further than the limit.

I said earlier that it had nothing to do with the draw distance that decided whether a prim is rezzed or not. This because artificially forcing the draw distance to a low value does not look good, and removes some interesting prims such as lights, walls casting shadows, and the like. It would look, well, broken.

Here is a couple pictures to illustrate what I have been talking about :

 
With just a semi-transparent bubble around the avatar, set to alpha 0.5. No max draw specified means we can see through. The camera cannot go outside this bubble, by the way.

With both a min and a max draw specified, you can see (barely) a gradient. Beyond the max draw limit, everything is black. Once again, the camera cannot go beyond the min draw limit (where the world starts getting blackened a little).
 

Of course, those spheres are visible to the user only, not to other people. It is a local thing, as it should be. It would have been possible to simulate all that with attachments, but then everyone would have seen those black spheres, right ?

On a side note, all the limits (camera and view alike) are set to be the most restrictive among those specified. Suppose you have several attachments imposing different view limits, the minimum range will be taken into account, so no way to cheat there. Same for the alpha, the highest alpha is retained. As for the color, it is a mix of all the specified colors (default is black).

There are some other things I'd like to work on if I find out how to do them. For example, I'd really like to be able to restrict the camera to points in space that are directly in the line of sight of the avatar's head. But that requires some heavy computation that cannot take place in a frame update. I'd also like to let the user choose how many steps in the gradient of alpha to render, because the more layers of alpha to stack onto each other, the slower the rendering. Lastly, for now the spheres that are supposed to obstruct the view, do not appear on snapshots. I'm currently working on a way to make them show (the snapshots I took here are not taken with the SL snapshot feature, but with a classic screen capture).

There is no ETA for the release, but it is nearly satisfying as it is, so it should come out soon. I'm also trying to keep the code clear in my repository so that it will be easy to port, for example to RLVa.

Have fun !
Marine

Restrained Love Viewer v2.9

$
0
0
Hi there,

As promised, here is the latest version of the Restrained Love Viewer (RLV if you lived under a rock for the last 7 years), with the brand new camera-related commands !

I won't detail all the commands here, the RLV API is meant for that kind of technical stuff, but let me just paste the release notes :

- added : @camzoommin and @camzoommax to prevent from zooming in or zooming out too far. This is great in games where the avatar is not supposed to have binoculars integrated directly in the eyes.

- added : @camdistmin and @camdistmax to force the camera to stay within a range, or at a certain distance from the avatar (or both). Set @camdistmax to 0 to force the view to Mouselook, and @camdistmin > 0 to prevent from going to Mouselook at all. This is great for games where you don't want the players to be able to cam around the sim, like in mazes.

- added : @camdrawmin and @camdrawmax to simulate fog or even blindness, by obscuring the world around the avatar (not around the camera like windlight settings do). Best used along with @camtextures. The camera is restricted to be inside @camdrawmin * 0.75 on top of it. This is especially fitting for blindfolds.

- added : @camdrawalphamin and @camdrawalphamax to indicate the closest and farthest opacities of the fog defined by @camdrawmin and @camdrawmax. When @camdrawalphamin is 0 (whicih is the value by default), you are assured that the world beyond @camdrawmax will be behind an opacity of @camdrawalphamax, regardless of the number of spheres rendered (which is decided by the new debug setting "RestrainedLoveCamDistNbGradients", which default value is 10).

- added : @camdrawcolor to set the color of the fog (default is black).

- added : @camunlock to prevent the camera from being unlocked from the avatar (it is unlocked when focusing elsewhere, or panning or orbiting the camera). This is great when you don't want the let the user see through walls.

- added : @camavdist to specify the maximum distance beyond which avatars look like shadows. This is great when blind or partially blind, to let the user know what the other avatars do, but not too clearly.

- added : @camtextures to make the whole world grey, except the avatars and the water. This is great when used along with @camdrawmin/max, to simulate blindness while still having a "feel" for the world immediately around the avatar. Please note that bump mapping and shininess stay untouched, because the avatar can "feel" whether a surface is smopoth, rough or slippery. (thanks Nicky Perian for the help !)

- added : @shownametags act exactly like @shownames, except it does not censor the chat with dummy names (but it does hide the radar, the name tags, prevents from doing things to an avatar through the context menu, etc). This is great for games where you have to find your opponents who may be hidden, and who don't want to be betrayed by their name tags.

- added : 3 more camera presets : left, right, top. This is to account for the lack of freedom we experience when @camunlock is set (since we can't move the camera much in that case).

- changed : now when you minimize a window in your viewer, its minimized shade stays where your window was, and the window reappears where the shade is when you restore it, so that the "Close" and the "Minimize/Restore" buttons stay at the same place. It was annoying when building and scripting to have windows move all over the place when minimized.

- changed : increase the limit of the avatar Z offset from -0.5/+0.5 to -1.0/+1.0.

- fixed : @detachall commands will not make the viewer stall anymore, they are now actually usable even when called on the top of the #RLV folder hierarchy.

- fixed : right click and selecting "Detach" on a temporary item in world did nothing (thanks Kyrah Abattoir for the heads-up).

- fixed : crash under @shownames, when a HUD owned by someone else spoke while imitating the name of its wearer. This was especially irritating when speaking to someone using a translator.

- known issue : RenderResolutionDivisor does not work well when @camdrawmin or @camdrawmax is set. No idea why.

- known issue : @camtextures won't hide the colors of the prim (the tint), only its textures. If someone knows how to fix this, I'm all ears !


Let me tell you a little about the camera restrictions. In essence, the goal is to let a script restrict the camera and the view : how far and how close the camera can go, how clearly and how far the user can see, and whether to let the camera go through walls or not. Here are a few pictures of how it looks with a "RestrainedLoveCamDistNbGradients" debug setting set to 40 :

 From 3 to 10 m, with an alpha going from 0 to 0.8

 From 0 to 10 m, with an alpha going from 0 to 0.5

From 3 to 5 m, with an alpha going from 0 to 1

You can also make all the avatars around look like dark silhouettes (or only beyond a certain distance), you can hide all the textures from sight to remove the visual feeling of the surroundings without cutting the whole picture (after all, a blindfolded captive can rebuild a visual image of her surroundings by the sounds, the touch and the smell, right ?).

As usual, you can grab the viewer here :
www.erestraint.com/realrestraint

And the MD5 hash for the Windows executable is :
852056e6f3ec2e7a406cb15507743fd7

On a side note, I am planning on updating all my RR blindfolds with this new feature (but users who are not on a RLV 2.9 will still have the old HUD so the products won't break), but it will take some time. Not because it's difficult (the script is already updated and tested) but because I have many more things to update in my brand, so I will take my time.

Have fun !
Marine

Upcoming changes in RealRestraint products

$
0
0
Hello there,

I have been thinking about this for a while, and I am writing this blog post to ask for your opinion (and opening comments for this so feel free to give me your opinion, but please make it constructive, thank you).

To me, a restrained sub should be vulnerable when out and about. I know SL is a virtual world and we are safe and all, but I am striving to make it feel as real as possible, so it strikes me as odd that a bound sub can walk everywhere without feeling helpless, and at the mercy of anyone who wants to overpower them, regardless whether they have a key to their restraints or not.


In fact, it may very well be something that some, if not most, serious players would agree with. Suppose you're outdoors with your hands cuffed behind your back, trying for example to slip out unnoticed (it could actually be a game, with the recent changes to the RLV...). But if you fail to go unnoticed and someone catches you, currently what can they do to you ? Nothing at all unless you permit it with an RLV relay or whatever attachment that has nothing to do with your restraints. That's not very realistic. If you're bound, you're vulnerable and people can do things to you whether you want it or not, that's the way I see it.

So here comes my idea. Suppose the person who caught you clicked on your cuffs, currently they would get a slightly condescending "you are not authorized" message and a suggestion to use a RealKey. Most people don't know what a RealKey is about, so they just assume they can't do anything to the sub and walk away. Opportunities of fun are missed. Even if the restraints are locked, there are many things that can be done to the sub, right ?

What I want to do is to provide the captor with a small menu, a little like the plugins browser, giving limited access to some plugins. These plugins would be Outfit, Sit and Leash. Because when you stumble on someone who cannot defend themselves, you can strip (or dress) them, you can snap a chain to their restraints (provided there isn't one already) and you can force them to sit somewhere.

This solution makes it safe for plugins such as "Public" (which immediately hands the key to the person touching the cuff), because only a handful of plugins would be available.

Currently what I'm trying to do is to add some code into the "Sit" plugin, which is present only in arms restraints, so that it triggers the menu I mentioned above. That preserves collars, legs and gags from this feature, and allows me to add this feature without adding a script for it. Notice that I didn't mention adding it as an option, if the sub is restrained, she is de facto vulnerable.

It makes sense to me, but does it make sense to you too ? Would you actually like such a feature ?


Thanks for your input,
Marine

PS : From the short but rich chat in the group immediately after I posted this article, it seems the general consensus is to have a plugin dedicated to it, that will be called "Vulnerable" (unless a better name is found), and that will give two switches : one for the sub only, to allow her keyholder(s) to make her vulnerable while bound, and one for the keyholder to actually make the sub vulnerable while bound or not. Only if both switches are turned on (they will be off by default, to let the restraints behave like they did until now), will someone get access to the Outfit, Sit and Leash plugins when clicking without having the key.

PS 2 : I'm sorry for taking so long to let the comments show... for once I will blame the tools because Blogger does not bother telling me when someone comments and that the comment is awaiting moderation. The consensus here is the same as on my group : such a feature needs a toggle, so there will be a toggle, as explained in the PS above. Thank you all for your comments !

RLV 2.9.1

$
0
0
Hi there,

RLV 2.9 had a few bugs and quirks that needed some taking care of ASAP, especially the color of the fog and the bugs in Mouselook, so here it is, RLV 2.9.1 which will hopefully work better for you !

See for yourself :

- added : Now when an item has been given by someone else or some object (such as a furniture), the user will be able to wear it and unwear it at will, regardless of the restrictions, until the next relog. This should help keeping the clothing restrictions from getting in the way of play.

- changed : Default to "Unconstrained" when opening a texture, whereas the viewer used to try to guess the proportions of the picture from its dimensions... but the server always serves textures as squares, so the default ratio was always 1:1.

- fixed... ish : RenderResolutionDivisor was broken, and is still broken, when turning the simulated fog on. It is not fixed yet, but now when using this debug setting while @camdrawXXX commands are active, the blur is set to be very high (256 for now), in order to prevent cheating.

- fixed : Mouselook was bugged when clicking on Alt, sitting down or teleporting, leaving the avatar stuck.

- fixed : The simulated fog introduced in 2.9 was not opaque enough, and it got worse when increasing the number of gradients.

- fixed : The color of the fog was wrong, too much greyish.

- fixed : @camavdist broke when impostors were turned off (thank you Vanilla Meili for the heads-up).

- fixed : Request teleport wasn't scrambling the attached message under @sendim.

- fixed : @tplure was preventing from receiving teleport requests, which was odd.

- fixed : The "Report" button on the context menu when right-clicking on an avatar was still working under @shownames and @shownametags, while it shouldn't be (you can AR someone through other means anyway).

As usual, you can grab the viewer here :
www.erestraint.com/realrestraint

And the MD5 hash for the Windows executable is :
0297cd8a2cfec77332a373ff8d66048d

Have fun !
Marine

Update to all RealRestraint products, v1.25

$
0
0
Hi !

As promised, here is the update of all the RealRestraint products up to v1.25, with three main features and many bug fixes and small improvements !

This update is quite big, and some products will require a full replacement, while others will do nicely with a soft update (when you click "UPDATE" on the menu instead of "REPLACE"). A RR Anim HUD is included in the update folder, so you don't need to replace the armbinder to get the new HUD.

The products that just need a soft update and do not need a replacement are :

- Armbinder
- Ballgag
- Scarf blindfold
- Body harness
- Isolation Hood
- Jammer
- Restrained Elegance (collar only)
- Ringgag
- Serious Shackles (collar only)
- Slave crate
- Straps arms
- Tape gag & blindfold
- Vixen leather training set (collar only)

And the products that do require a replacement (because of new animations and some slave scripts being updated) are :

- Police handcuffs
- Police legirons
- Pretty Mummy (all of it, gag and blindfold included due to slave scripts having changed) (*)
- Restrained Elegance (except collar)
- Serious Shackles (except collar)
- Shibari arms
- Shibari legs
- Siren arms
- Siren legs
- Straps legs
- Vixen leather training set (except collar)

Normally, if I did my job correctly, you should not see an "UPDATE" button if your product is part of that second list, but you will necessarily see "REPLACE" since that product has been identified properly. But if you do see an "UPDATE" button and your product is part of that second list, DO NOT PRESS IT. Although the product would still work afterwards, it would not have the new animations, therefore it would not be recognized as a retail product in a future update anymore.

(*) For the Pretty Mummy set, the warning stated above is not entirely true. You can still choose "UPDATE" on it and it will not break future update attempts, because only a slave script has been changed, which makes no difference to the updater. You will not benefit from most of the changes specific to this set, that's all (but you will still benefit from the changes to the core scripts, like the RLV 2.9 features for the blindfold, the new feature on the Anim HUD, the new Vulnerable plugin, etc).


Here is the list of what has changed :

Firstly, following the release of RLV 2.9 and its new camera commands, the restraints now use these new commands to make blindfolds much more enjoyable. Instead of simply moving a prim in front of your view to blind you totally, you will now be blinded "selectively" : the tighter the tie, the smaller the area you can see around you (but you can still see yourself), beyond it will be just black (or mostly opaque for the three lower locks, "Blurry", "Very thin" and "Thin"). More so, the three upper locks ("Medium", "Tight" and "Opaque" will remove the texture of everything around you, so you can only guess what you're touching. In "Opaque', you will really have to hug the walls to actually have a clue where you are going. But it's better than not seeing anything at all, right ? Also the upper locks will turn people into silhouettes, unless they are really really close, to enhance the feeling.

Secondly, a new plugin, called "Vulnerable" is added to all the arms restraints, and only them (not collars, gags, blindfolds or legs restraints). The gist of it is simple : when your arms are bound, you are more vulnerable than when they are not (well, duh), so anyone can do things to you without you being able to resist. Namely, they can strip you by force, make you wear things (but not lock the outfits on you), they can force you onto some furniture, and they can snap a chain to lead you around. But the latter two features will not be available if you are already locked down on a furniture by the keyholder, or leashed by the keyholder, respectively, to avoid breaking their set up. This plugin, as discussed in earlier threads, has two toggles : one for the sub to allow the dom/me to make them vulnerable (they are not by default), the other to actually make the sub vulnerable when tied. That way, the sub is vulnerable only if she and her top wish so.

Thirdly, the ability for anyone who owns a RR anim HUD (that's anyone who wants, since that HUD is copy/mod/transfer, just ask the sub to give you a copy of it) to actually command the animations and poses of the nearest sub around. Even if she is not tied by them ! More so, the top can even "freeze" the sub in place, i.e. make her unable to change her position herself. This simulates the fact that once bound, a sub can be rolled over or held in place forcibly, and she cannot resist. More power to the dom/mes ! Attention, the sub needs to have a RR product v1.25 or above, or it won't let the HUD (even the updated one) control it. The feature takes place in both the Anim HUD and the Anim plugin.

Aside from these new features, there is a number of smaller changes and fixes that I hope will satisfy everyone :

* Autolock :
- changed : Prevent access to the wearer while the plugin is running and there are macros waiting to be executed.
- changed : The countdown is now hidden by default.
- fixed : The first macro run after a reset would execute immediately, due to a faulty timestamp check.
- fixed : Setting a timer on a macro didn't reset any existing timer when executed, resulting in ever-growing timers when stuck in a loop.

* Anim plugin :
- fixed : Possible infinite loop in some rare cases, resulting in the plugin freezing, but not crashing.
- fixed : Struggling animations did not default well, resulting in struggling not moving at all while it should, on some restraints.
- fixed : Prevent the plugin from saying "LABEL : 1/1" when changing the pose while it is unlocked.
- fixed : Do not change the avatar height offset automatically when sitting on something.

* Unlockable :
- fixed : "keys on" was written instead of "loosened"

* All arms restraints :
- added : The new "Vulnerable" plugin for forcing the sub while not having the key (see above).
- added : New groups of poses for the "hands back" locks, with the hands crossed higher behind the back, with a more relaxed look. It's quite sexy.
- changed : The RealRestraint_Base.1 script now uses RLV 2.9 features (only if the user is on a RLV 2.9 or above), which means when forced to Mouselook, the avatar is actually locked into Mouselook, with no way out of it.
- changed : When /77 is off, clicking on the RR HUD (when blocked) will not go to the main menu any longer, nor using "menu" button on the RR Anim HUD. Careful, this means a sub can really find herself stuck now, but this is desirable in some situations.

* All legs restraints :
- added : The 3 legs poses from the Pretty Mummy set (lie straight up, lie up with the back arched, lie down with the knees bent 90°).
- changed : Replaced all the "TTSd" (standing straight in "Tight") animations by the newer, sexier one from the Pretty Mummy set.

* All blindfolds :
- changed : The RealRestraint_Base.2 script now uses RLV 2.9 features (only if the user is on a RLV 2.9 or above), which means no more HUD covering the screen, the blindfolds will now be much more enjoyable !
- changed : When /77 is off, clicking on the RR HUD (when blinded and not on RLV 2.9 yet) will not go to the main menu any longer. Careful, this means a sub can really find herself stuck now, but this is desirable in some situations.

* Siren ropes :
- changed : Make the Style and SirenTex plugins back to "keyholder only", since the sub is not supposed to be able to change the ropes after having been bound. It was made that way as a convenience, but it confused many people and was not very realistic. Plus, the Pretty Mummy set did not work that way anyway, so here is a little consistency across different products.
- changed : The Style plugin won't change the style when the same lock is chosen repeatedly. Once again I had done this that way for convenience, but it was just confusing and sometimes frustrating. Now if you want to change the style of the ropes, just use the Style plugin.

* Armbinder, Ball gag, Scarf blindfold, Shibari ropes, Tape gag & blindfold, Vixen set :
- changed : Make the BinderTex, Color this, Color all, ShibariTex, TapegagTex, TapeblindTex and VixenTex plugins (respectively) back to "keyholder only", since the sub is not supposed to be able to change the restraints after having been bound. It was made that way as a convenience, but it confused many people and was not very realistic. Plus, the Pretty Mummy set did not work that way anyway, so here is a little consistency across different products.

* Pretty Mummy :
- added : Some struggle anims from other ropes sets.
- added : Now the "Cover ears" plugin has an "IM blockable" button, unset by default, to allow the dom/me to block the IMs or not, just like the Isolation Hood. That way the sub will not have her incoming IMs blocked if she doesn't want to.
- added : The Style plugins of the gag and blindfold allow to hide and show the wads of cloth in the mouth and on the eyes respectively. This allows, for example, to wear a ballgag or a disc blindfold under the tape. The effect is quite nice !
- changed : The "Very funny" plugin hides the drawings by default.
- changed : The sounds now depends on the chosen tie, but also on the tie the restraint was on. For example, unlocking the gag from "Loose" (where only the wad of cloth shows in the mouth) will sound like removing the fabric, while unlocking it from "Tight" will sound like removing tape, plastic, latex or cloth.
- changed : Now one can only change the color and opacity of the parts of the set they have control on. For example, if the sub is tied in "mummy" in both the arms and legs, she won't be able to change the color of the body fabric by using the MummyTex plugins on the gag or blindfold.
- changed : The modifiers and costs for the Wriggle plugins of the set have been lowered, to make it easier to switch from standing to lying and back.

* Body Harness :
- added : Now the harness has the Outfit, Wear and Unwear plugins so you can force the sub to wear and unwear clothes, and prevent her from wearing or removing certain outfits. For example, it can be used to lock a catsuit on, since it is locked over it.

* Lockable_Plugins :
- changed : Now each page shows 9 plugins and the favorites are gone. It was confusing and took too much room anyway.

* RealKey plugin :
- changed : Modified to take the Vulnerable plugin into account.

* Touch :
- changed : When prevented from touching one's own attachments, the restraint will not have the "touchme" exception to it, so the sub has to use the /77 channel (if allowed).

* Outfit :
- changed : When accessed from Vulnerable (i.e. the user is not authorized to use this restraint, but Vulnerable gives them limited access), the buttons that control the restrictions ("Unshared", "Wear", "Unwear" etc) are not visible.

* Leash :
- changed : When accessed from Vulnerable (i.e. the user is not authorized to use this restraint, but Vulnerable gives them limited access), if the sub is already leashed by the keyholder, this plugin won't be available to the user.

* Sit :
- changed : When accessed from Vulnerable (i.e. the user is not authorized to use this restraint, but Vulnerable gives them limited access), if the sub is already tied down on a furniture by the keyholder, this plugin won't be available to the user.


There are four updaters in-world. Go to one of these locations, spot the updater (it looks like a black orb with stars, floating above some kind of pedestal), and click on it. The rest will be explained on site.

My little shop : http://maps.secondlife.com/secondlife/Pak/76/61/105

The Little Shop of Kink : http://maps.secondlife.com/secondlife/Lineside/102/146/77

S&M Castle : http://maps.secondlife.com/secondlife/Free%20Bird/38/149/39

(near my vendor, you need to walk a little)

Roper's Dark Playground : http://maps.secondlife.com/secondlife/Amber%20Bay/135/57/28
(not easy to spot, for the time being it is located on the right of the main structure, the black castle)


Have fun !

Marine

New project, new technology, more fun !

$
0
0
Hi there,

Let me tell you about a project of mine that I've been brewing in my head for some time... And recently I have made the whole tool chain that allows me to realize it. Now... I could get all technical on you, but instead I'm going to shake my butt.


Do I have your attention now ? I mean, really ?

Okay. So as I was saying, this tool chain allows me to -- hey, you there, will you stop staring at my butt for a minute please ? Thank you.

With this tool chain, I can process a video into animated textures that I upload back into SL and -- what, again ?! Okay, I knew it was a bad idea. I give up, I'll show you what I mean with videos :p


Right now, if someone took this video and somehow turned it into an animated texture, the resulting texture would look like this :


As you can see, it is a mosaic of frames organized so that SL will play them one after the other, from left to right and top to bottom, at a pace fast enough that you have the illusion of movement. If it were uploaded into SL, it would look like this :


Pretty blurry, isn't it ? This is not surprising, the video lasts 30 seconds and was shot at 10 frames per second. This gives 300 frames, decimated down to 256 frames, so that the texture is exactly 16x16 frames (a square is a better choice so we don't have any stretching). Since the maximum size of a texture in SL is 1024x1024, the math is simple : each frame is a small 64x64 thumbnail. Stretched up to fit that square you see in the video above, you can see why it is blurry.


And that's why you don't see many animated pictures in SL, except for controls and the like, stuff that doesn't need a high resolution and a big number of frames at the same time. But you don't see good looking videos unless you use media, which means your viewer connects to an external video (YouTube or whatever), and then all bets are off. You don't have any control over what kind of url your viewer connects to, the url could be potentially malicious. None of this happens with animated textures, since you are only looking at harmless textures inside SL.


If you don't want to give up too much detail nor too much smoothness, you have two options.

The first one is to cut the time frame of the video into several short clips that are to be played in succession. This is all well and good and makes sense, but unfortunately, playing videos is a viewer-side feature, while the switching from one part to the next is the responsibility of the script telling the viewer to play that video. In other words, both will never be synchronized well enough, there would always be a slowdown or a pause between two parts of a video.

The second option, the one I chose, is to cut the screen itself into parts, in 2x2 squares, 3x3, 4x4 etc. That's what my tool chain does and when it's done, it creates a bunch of textures that I just upload back into SL.

Here is how the video looks in 2x2 (that's the exact same AVI file you've seen at the beginning of this post) :


It's much crisper already, but I can do better. Look at it on a 4x4 :


Now we're talking. You can see each piano key for example. And no I am not showing myself on the videos because of a sudden case of inflating ego... but only to show you that this is SL, and the scale of the TV compared to an avatar :p


As you can see, this 30 seconds video, shot at 10 frames per second, looks a lot better on a 4x4 screen (that's 16 textures of 1024x1024 each, instead of only one) than on a regular 1x1 square prim. There are seams between the different squares, but that's due to how SL stretches small textures (since each individual frame is still small), it blurs it, I can't do anything about that. The texture itself is crisp without any blur, I saw to that (you can check in the animated texture above in this post that there is no blur in it).


You must be thinking, where is she going with all this ? Well now that you understand the technical stuff (and that I've shaken my butt enough), maybe you can see the possibilities of such a device.

First of all, the TV itself that you've seen on the videos above is fully working and can display a video on a 1x1, 2x2 or 4x4 screen. It also adapts the dimensions to the specified dimensions of the video or picture (because it can display static pictures as well, even multi-part ones) so that they don't look stretched.

It plays a playlist received from the decoder (which looks exactly like an old VHS tape recorder), which itself receives it from a VHS tape.

And that's where it becomes interesting : the movie producer (Yours Truly for the moment) shoots a video into an AVI file on the hard drive, then processes it through the tool chain I made, then uploads the resulting pictures into SL (automatically named so the SL scripts understand that they are in fact one single video, and the parameters such as the speed, the number of frames and so on). So far so good.


Then they insert the pictures (without changing anything to the names) into a VHS tape, which calculates a playlist out of it. Then, once the tape is inserted into a decoder, the playlist is transferred to the decoder, which in turn dispatches it to all the connected TVs. But the textures are never transferred anywhere nor to anyone, the tape deletes them before they can be taken out. Everything is encrypted so the data are safe.


For now the tool chain I made is pretty difficult to deploy (it uses 4 different tools, all freeware, that need to be installed on the computer), so I will keep it for myself for a moment. Plus I must make sure it works perfectly, it's still a little rough around the edges. But I can at least start the fun part of the project :

Producing erotic SL movies !


Think about it : nowadays we've got a lot of good looking furniture with gorgeous motion-capture animations for solo avatars, couples, threesomes and even more. Those animations can take up to 30 seconds so we need the best resolution in order to render them into SL as animated pictures without looking dull. We've had erotic SL comics, now we'll have erotic SL movies !


I know it sounds silly and all, but isn't every new technology used either for war or for sex first ? Sex and war are what make the world turn !


In all seriousness though, this technology isn't going to be used for eroticism only. It has actually nothing to do with eroticism, it's just a video recorder and player. I will produce eroticism because everything I touch turns to kink, but it will be great for in-world demonstrations, fashion shows and the like, without having to rely on videos on external servers (which, I repeat, always contains a part of risk, whereas with animated textures you're safe, since it stays within SL).

I will be more than happy to share this system once it is mature enough (no pun intended), but it is still a bit early for that. What I will do first is produce a few good videos with friends, for once mixing business and fun because I will create an SL "company" for it (I have yet to decide the name but it will probably be a silly one), sell tapes (for a small price) as well as the TV with its decoder (for a small price too). Then, if all goes well, I will probably hire more actors and actresses to produce more videos, but I don't know how many yet. What I do know is that the processing of such videos will be the bottleneck of the whole production, and with the amount of work that is awaiting me for the next months, I can't afford shooting videos to take more than a fraction of my time. In other words, I'll be part of this business only for a limited amount of time, after which I will probably write an API of some sorts and release the scripts (not as open source since the protocol is encrypted, but free to distribute nonetheless), as well as release the tool chain and explain how to make it work. I do want high resolution videos to be part of SL !


Of course, you know the drill : no ETA, I'm just stating what I am working on. And shaking my butt :p

Marine

The Bubblizer

$
0
0
Merry Christmas !

Today I'm releasing my latest project : The Bubblizer !

Wait, the... what ?

The Bubblizer is a game that can be seen as soccer or dodgeball, with a streak of kink, a lot of shine and a good dose of bondage.

It is a game for between 2 and 32 players, with between 1 and 40 balls, or bubbles, in an arena that spans from 8x8 m to 32x32 m wide. Whether the goals are rezzed or not, the game would be either a soccer game or a dodgeball game respectively.

In dodgeball mode, players aim at other players when kicking the bubbles, while in soccer mode they aim at their goals, that they are trying to defend.


Before we go further, take a look at a few pictures :


A field like no other


It is hard to play soccer when your opponents keep adding restraints on you !


Ok the blue team is clearly winning


The pink team is getting their revenge !


If you want real chaos, try a free-for-all !


As you can see, the players are wearing shiny catsuits and restraints. They are both provided for free by the game. The restraints are mesh and can be resized easily.


The rules of the game are simple :

- If you find a transparent bubble, bump into it to make it yours.

- If you see a player you can kick this bubble to, do it.

- If someone kicks an enemy bubble towards you, run !

- If you manage to hit a player (or their goal) with your bubble, you score and you can choose to restrain them or to remove a restraint from yourself.

- Choose the restraints wisely, for each restraint has its own effect. Putting the right restraint at the right time may turn the tables in your favor !

- After the end of the game, the player who scored the most wins and gets unbound. The rest of the players stay in bondage, and their restraints are available to all (except themselves and the other losers, of course).


This is simple, but there are many things the players can do to achieve a leading position. They can grab and toss the bubbles, they can make a bubble of theirs "contaminate" or absorb another one by making it bump into it, they can pop enemy bubbles... a lot of tactics and strategies are available in order to prevail on the field.

Attention : The game can take up to 100 prims in Land Impact when you choose to rez the bumps, the columns, the goals, the biggest arena with the highest number of bubbles. A standard game, let's say a 10x10 field with 20 bubbles, will take 50 prims in Land Impact. When idle (everything derezzed), the Bubblizer takes only 1 prim in Land Impact and has a script time usage of 0.002 ms (the lowest a script can do).


You can find the Bubblizer in any of the Marine's Goodies vendors. There are not many among the grid so here are the known locations :

My Little Shop

The Little Shop of Kink

Fabulous Pony Ranch

Trotting Tails Ranch


The product costs L$1000, and is copy/no-transfer.


Have fun !

Marine


PS : If you want to give the Bubblizer a try before buying, you can find one in Bondage City : click on the teleporter near you when you arrive, and choose "Bubblizer Field" on the menu, then sit on the ball that appears to TP there.


Update to v1013 :
* Added a "Join/leave" button to the menu of the attachment, to join or leave the nearest server. This is useful if the player is bound too tightly to be able to touch the scoreboard to join or leave the next game.
* Added a male version of the catsuit. Don't wear both catsuits at the same time, it would look strange !
* Made the wrinkles on the elbows of the catsuits look better.
* Added a pattern to the catsuits. This pattern is black but turns white if the catsuit is too dark (i.e. when it is green, red, black or purple).
* Made the green team darker.
* Sharpened the skin texture of the catsuits.
* Made sure the resizing mode is turned off when the game starts.
* Prevent the restraints from working if RLV is deactivated.


Update to v1014 : This update contains mostly bug fixes, no new stuff.
* Changed : Increased the range of tossing a bubble from 2 m to 4 m around the player.
* Changed : Make it so the lifespan of a bubble is calculated from its latest collision or touch.
* Fixed : Don't let a restraint go over level 3 (it could happen when two players restrained a third one at the same time).
* Fixed : Don't let an opponent grab and stop your bubbles. This implied reviewing the whole logic of grabbing and tossing a bubble.
* Fixed : Make it so only immobile or very slow bubbles can be grabbed. You can still stop your own bubbles in mid flight by clicking on them.


Update to v1012 : This update is merely about making the Bubblizer rez its objects correctly independently of its rotation around the Z axis. Normally the scoreboard should face an avatar who is standing on the "BUBBLIZER" logo on the platform.


Update to v1011 : There is another update available as of today, December the 31st, 2013, with the following changes :

* Fixed the rezzing bug, which would prevent some objects from derezzing when someone TPs in or out of the sim (due to a strange race condition that does not occur under normal circumstances).
* Switch the bubble's physics envelope to "convex hull" so that it does really take only 1 prim per bubble and not 23. I'm sorry, I should have seen that sooner. And now the bubble/bubble collision box is even better than before, I think.
* Prevent from grabbing enemy bubbles (I really thought that was the case before, but no).
* Keep a bubble harmless while it is grabbed, even if it is owned. That way you can't grab and drag a bubble into a player or a goal, that would be too easy.
* Don't allowtossing a bubble if it is further than 1 m away from the player when releasing the mouse button. That way you can't toss just any bubble on the field in any direction, and you can't toss bubbles at very high speeds either.
* Reinitialize the game immediately after the end, but keep the score showing on the scoreboard (the teams are emptied, though).
* Move the scoreboard a tad bit further inside the arena so it doesn't flicker when seen from afar at shallow angles.
* Hide the teams that do not have any players on the scoreboard for better readability.
* Don't say the scores on the chat when simply shutting the Bubblizer down while no game is playing.
* When shutting the Bubblizer down, release everybody except those who have already lost.
* Reduce the darkness of the nipples on the catsuit.
* Add very short rules in the "Bubble restraint" notecard, before the pictures, so that new players will know what to do even without reading further.


Update to v1002 : There is an update available as of today, December the 29th, 2013, with the following changes :

* Added complete rules in the restraints folder, grouped in several pictures for a better readability.
* Added a short text on the platform itself, to explain what to do to get the menu.
* Added a short text on the scoreboard when rezzed, to explain where to click to get the gear.
* When the game ends, the scores are shown on the chat as well, both per team and per individual player.
* The game keeps the players registered for 3 minutes after the end instead of 1 minute.
* When nobody wins, everybody is released instead of just the pink team.
* Added an option to ignore restraints during the game (but the losers do get restrained after the end). When hitting a player or a goal, the player doesn't get a menu and scores immediately instead.
* Changed the visibility of the cuffs, they should not appear when the arms are bound tightly anymore.* Improved the menu on the game, duplicated the "Dodgeball/Soccer" switch to two of the pages for better usability and logic.
* Improved the menu on the restraints by adding the current status of the target.


Click on the small arrow on the scoreboard to request an update (owner only).

Battery

$
0
0
Hello there,

Here is a new product in the Marine's Goodies brand (i.e. not quite kinky but not quite vanilla either, and always useful) : a battery.

It was meant to be released months ago, along with the Mousewheel, but for some reason I dragged and dragged, RL got in the way, I wanted to improve the battery from what it was capable of at the time, well you know the feeling. I'm sorry for letting you wait.

Its purpose is to act as a "buffer" for the energy output of the Mousewheel, Treadmill or whatever other power source you can come up with. Without the battery, lights receiving power from such power sources needed said power sources to actually deliver power. In practice, that would mean a sub was needed to run on a Mousewheel or a Treadmill in order to use your lights.

But with this battery, no need for a sub to run at all times ! Make her fill the battery with her efforts then send her to rest or frolic or whatever it is your sub does when she's not working, and you can use the accumulated energy until it depletes.

In the box you will find not only the battery itself, but also three full-perms lights, the same as the ones you get with the Mousewheel and Treadmill, and a copy of the script they use, should you want to make your own devices.

Speaking of which, the manual contains all the info you need in order to build your own devices to suck power out of the battery. The protocol is simple and fully documented. You will even be able to sell your own devices if you like, why not ?


The price of the product is L$200, for one battery (copy/mod/no-transfer), three lights (full-perms, only their script is copy/no-mod/trans) and a copy/trans "Light" script to make your own devices.

You can find it in any of my Marine's Goodies vendors. There are not many in-world, but here are a few destinations :

My little shop : http://maps.secondlife.com/secondlife/Pak/76/61/105

The Little Shop of Kink : http://maps.secondlife.com/secondlife/Lineside/102/146/77

Fabulous Pony Ranch : http://maps.secondlife.com/secondlife/Lost%20Island/84/176/21

Have fun !

Marine

New product : HD Video System

$
0
0
Hi !

I am proud to announce the release of the first High Definition Video System in Second Life !

Remember what I blogged about nearly two months back ? Well it's ready now, and even better, I am releasing the tool chain I mentioned at the same time, in open-source.


This video system is quite powerful. It can :

* Display HD pictures (pictures bigger than 1024x1024, the current max is 4096x4096, but it can be extended later).


* Display HD videos (animated pictures with a better resolution than what simple ones, allowing for 30-second long videos).


* Play long sounds without gaps (sounds that last longer than 10 seconds, for example musics). You can hear an example of a music in the video above.

* Display subtitles. The video above also shows one of the subtitles. Subtitles are simple hovertexts so it is easy to make your own story that way.


And all of it is inside SL. No external media source such as YouTube, nothing. It's safe and you can watch with your friends, everybody would see the same thing at the same time !

All the data of a movie are contained in a tape that looks like a VHS tape (if you're old enough, you have the right to feel nostalgic), and you can buy tapes and even create and sell your own ! More than a simple product, this video system opens a whole new business ! It's easy, everything is explained clearly, with examples. And if you don't really want to make movies but you want to create your own slideshows, it's even easier.

So if you are an artist, like those people who tell Second Life stories on Deviant Art, not only this product will help you, but it may even become a business for you.

The basic manual for the video system is actually on a tape rather than in a notecard, so you both learn how to use it with many pictures and videos, and see what this system can do.

To produce HD content for this video system, in a nutshell, you need to download 4 free, open-source tools (Python, VirtualDub, ImageMagick and ShnTool, if you want to know), and to process your content with the Python scripts that are provided in the Director's Manual. Everything is explained clearly there. You don't need any programming skill to make them work.

The product is Copy/Mod/No-Transfer, and takes 11 prims when rezzed (10 for the TV and 1 for the player). It costs L$400 and you can find it in any of the Marine's Goodies vendors. Here are a few SLURLs :

http://maps.secondlife.com/secondlife/Pak/76/61/105

http://maps.secondlife.com/secondlife/Lineside/102/146/77

http://maps.secondlife.com/secondlife/Lost%20Island/80/168/22

http://maps.secondlife.com/secondlife/Sensual%20Freedom/172/130/30


And for the first time, I am opening a store on the Marketplace. Not to sell Marine's Goodies or even RealRestraint products, but to sell the movies I will produce, specifically for that video set. The name of the store is "Maison de la Marquise" ("House of the Marquess" in French, a homage to "House of Gord"... and it's always more erotic when said in French, isn't it ?), and is dedicated in producing and selling high-quality adult videos.

The store is at :
https://marketplace.secondlife.com/stores/163370

And the video set being available at :
https://marketplace.secondlife.com/p/HD-Video-System/6398304

At the time of this writing, there is only one movie in the brand, it is called "Applicant Payback". It is not kink-centered (more like vanilla porn, with a little flavor of kink near the end), but it is high-quality. The next movies I will produce will be a lot kinkier, with themes that will mostly revolve around heavy bondage and domination.


Have fun !

Marine


PS : It will take some time for people (me included) to produce movies for this video set. This is normal, because movie producers need the provided tool chain to make their own movies. I will make my own too, in the meantime. As I pointed out earlier, it will be erotic movies, mostly about kink (bondage, ponyplay etc). It will be fun ! And yummy !

RealRestraint update to v1.26

$
0
0
Hi !

As promised, the RealRestraint line has been updated to v1.26. Don't be afraid, only one product needs a replacement, and that is the Pretty Mummy set. The rest of the products need only a simple update (if they were already v1.25, that is, otherwise a replacement will be required).

The biggest change in this update is the Pretty Mummy set itself : Linden Lab has provided us a way to control materials through scripts, so it was time to merge all those 4 variants (the old Latex, Plastic, Tape and Wrap boxes) into one... and to add even more materials !

Instead of the 4 original materials, you will now have access to 15, all of them through the MummyTex plugin of every part of the Mummy set. You have Latex (*), PVC, Rubber, Plastic (*), Bin plastic, Smooth plastic, Bondage tape, Vinyl tape, Duct tape (*), Nylon, Wrap (*), Gauze, Waxed fabric (**), Spandex (**) and Bodystocking (**).

(* : Those are identical to the original ones of the same names)
(** : Those are new, they look like Wrap, but without stripes)


Here is the full change list brought in this version :

* All restraints :
- fixed : When /77 was turned off, the wearer could not click on the secondary items. This made no sense, since blocking touch is the responsibility of the Touch plugin (for RLV users) and the "Block" feature (for non-RLV users). If you want your sub to be incapable of touching their restraints, you have to block /77 AND touch.
- changed : Now, only the keyholder (or everybody if the keys are available) can change the animation of the sub, unlike before. I got a lot of flak from people who really really didn't want just anyone to change their animation, and there is no room in the Anim plugin to allow for an option. If I can make it an option in the future, I will, but for now it is keyholder-only.

* Ropes, tape, blindfold, mummy, and every third-party plugin that uses Unlockable :
- fixed : The API wasn't respected for the "-20" link message, and could confuse some third-party plugins. Now the "-20" link message is sent again when someone touches the ropes (for example), and if "Force" is pressed, then the new "-40" link message is sent. This will be updated in the plugin template as well. In plain English, this means that some rope-specific third-party plugins that were broken in v1.25 will work again in v1.26.

* Blindfolds (with RLV 2.9 active) :
- changed : Now, when locked on Medium, Thick or Opaque, hovertexts in world will be hidden (but not those on the HUDs). This is normal, the sub is not supposed to be able to read in those configurations.

* Pretty Mummy :
- changed : Merged the 4 variants into one, added the ability to change materials through the MummyTex plugin.
- changed : Removed the Shape plugin, since it served only as a way to copy and paste the shape of the set across variants.
- fixed : When tying the legs on "Pet", the arms would go on "Pony" but "Loosened". Now the one who ties the legs also gets the arms, but ONLY if the arms had no keyholder prior to that.

* Ropes in general :
- fixed : Now, the leash texture is updated also after a reset.

* Shibari :
- fixed : The textures were rotated and stretched wrong when changing them through the ShibariTex plugin, and there was no way to get them right again.
- fixed : The leash texture and the hogtie/lotus particles were wrong. They are now exactly the same as the ones in the Siren rope set.
- changed : When tied on "Tie", two coils of rope will show around the arms and legs so that the sub can be tied to some furniture. Attention, to benefit from this change, you need to have your Shibari replaced (arms and legs).

* Vixen collar :
- fixed : When locked on "4 Post high", there was a useless "+0 h" message or something like that. It didn't do any harm, but it had nothing to do there.


You can find an updater at the following places in-world :

My little shop

The Little Shop of Kink

S&M Castle

Roper's Dark Playground


Have fun !

Marine

New RealRestraint product : Deluxe Gag & Blindfold

$
0
0
Hello there !

Let me introduce you to the latest product in the RealRestraint line : the Deluxe Gag & Blindfold. This is another restraint I've been wanting to make for years because I love this design, and that needed mesh and materials to look good enough, so here it is finally !


This is the classic harness gag that you see everywhere in BDSM scenes : a V-shaped strap over the face, a Y-shaped strap on the head, and horizontal strap around the jaw and behind the neck. Its purpose is to hold a gag as tightly as possible, tighter than the regular ring, ball and panel gags that sport only one strap, without much chance of escape. Tight, secure, and sexy !

It's also a 3-in-1 gag : it is a ring gag, a ball gag, and a panel gag, all in one object. The ring can be converted to a bit (for ponygirls and boys), and the ball can be converted to a ball/bit combination. And it is not just for show, you won't "speak" the same way if you are gagged with a ring than if you are gagged with a ball, and yet differently if your mouth is covered.


More so, although the "Simple ring" and "Simple ball" will make you speak exactly like the RealRestraint Ring Gag and Ball Gag respectively, being gagged in "Harness ring" and "Harness ball" will garble you even more. Yes, they're tighter than the "Tight" level of the other RealRestraint gags, without being totally silent (you have to choose one of the "Total" locks for that, no surprise there).


And it comes with the assorted blindfold, that uses the latest RLV 2.9 camera features, to complete the package :


With these RLV 2.9 camera features, you can see yourself and what's very close to you, and that's it. The range of your vision depends on how tight the blindfold is locked :


Materials

The textures of this head harness are made with materials, i.e. the leather actually shines dynamically !


This means that you need a materials-capable viewer with "Advanced Lighting Model" activated in the Graphics Preferences. You can do this at next to no cost for your graphics card, even if it is not too powerful, by turning the shadows off in the drop-down list below :


Textures


The leather textures are the same as the ones used in the Leather Body Harness I released a few months ago. Therefore, your Deluxe Gag and your Body Harness are perfectly assorted.

And like the Body Harness, this harness gag & blindfold combo is entirely customizable :


To customize the gag (or the blindfold), click on it, go to "Plugins", then "HeadHarnessTex" :


The menu itself is rather simple. On the left side you have the parts of the harness you want to select and the textures and colors you want to apply to them, and on the right side you can choose a preset that will change the colors and patterns automatically, and to either apply the change to the object you have clicked on (gag or blindfold), or to apply those changes to the other object as well so you don't have to do this twice.


The "Sections" button allows you to select sections of the harness individually (a section is a strap, the rings and other metal parts associated to it), or groups of sections such as only the vertical straps or only the horizontal straps, or only a restraint part (ball, bit, ring...), or even the harness entirely :


The "Surfaces" button allows you to select some parts of the sections you've chosen, such as either the front of the straps, or the trim (the side of the strap), or the fasteners or the rings, or even a group of those surfaces, such as the whole strap, or all the metal stuff, or even the whole section (you don't usually want to select the whole section but only either the whole strap or the whole metal, but why not) :


Of course you can color the straps the way you like thanks to the "Tint" page :


And if you can't find the color that you want, you may just specify it yourself with the "CUSTOM" button. Simply write the color in RGB format (either from 0.0 to 1.0 for all three colors, or from 0 to 255 like in the SL color editor), then click on "Submit". For example, if you want a teal tint on the vertical straps only, select "Verticals" in "Sections", then "CUSTOM" in tint and enter "64 128 128", like this :


You can change the textures on the "Pattern" page, giving you access to many patterns and writings :


Some of these patterns come in two versions : white on black (written "W&B") and black on white (written "B&W"). Be aware, though, that tinting the straps will tint the patterns as well, in other words it will add some color to the whole texture. It does not cause any issue with black (tinting black will still give you black) nor with white (tinting white will give you your tint exactly), but tinting a different color is problematic because they mix : if you tint a red texture with a blue tint, you end up with some violet.

That's why most of the provided patterns are either black, white, or both, and you can't have two colors on any face unless one of them is black. If you want more than black plus a tint, you need to make the texture yourself and tint it white.


And if you don't really want to bother with precise tinkering, you can always apply a full preset, such as totally black, or black with a red trim, or all yellow, etc, by going to the "PRESETS" page :


If you have some basic knowledge on how to make and import textures into SL, and if you are interested in making your own patterns, read on. Otherwise, jump to the next section.


You've seen several examples of customization above, but you can also create your own textures if you like. The textures contained inside the gag and blindfold are full-perms so they can serve as examples for your own, but you are also provided two base leather textures (black and white) and the UV map of the straps :


This texture is a sort of template that indicates how the whole image is "wrapped" around the strap, like paper wrapped around a gift.

As you can see, the UV map is simple... just write or draw what you want in the middle of the texture, between the two horizontal lines. The two orange strips above and below it represent the trim.

There is a thing to know, though. You might have noticed that the horizontal and vertical straps may or may not share the same pattern (that depends on the pattern). For example, the pattern "You command W&B" will display "YOU COMMAND" on the horizontal straps and "I OBEY" on the vertical ones :


This is because the pattern "You command W&B" is in fact composed of two textures : "You command W&B" and "You command W&B V".


Notice the letters are rotated 90° to the right on the second texture. This is what you will have to do too if you want your textures to be different when the straps are horizontal or vertical : simply name them exactly the same, but add a space and a capital "V" at the end of the vertical one. Also make sure the name does not go beyond 23 characters, which is the limit for a button on the menu.

Some patterns do not have a "V" texture but a "W" one (but they can have both), this is the case for the Seam textures (W&B and B&W). The "W" means "apply this on the blindfold and panel prims". In the case of the "Seams" textures, it will simply not display any seam on the blindfold and panel, because it would look bad.

Once your textures are done, drop them inside the gag and the blindfold (yes, both of them). No need to reset, they will reset themselves and rebuild their lists right away. Be advised that the textures need to be full-perms as well, or they won't be used by the two HeadHarnessTex plugins.

End of the technical part


Style


To hide some of the straps and show others, you use the "Style" plugin, just like in the RealRestraint Siren ropes and Pretty Mummy sets. This gives you the ability to transform your Deluxe Gag into a classic gag, or into something between a classic gag and a head harness :


The "Style" plugin is simpler than the "HeadHarnessTex" plugin, because it has only one page, that shows the styles that are available for the current lock. For example, in the "Simple ring" lock, the "Style" plugin gives you the ability to hide and show the chin strap, and to replace the ring with a bit (which garbles your speech pretty much the same).


Likewise, when selecting the "Lock" lock (which doesn't garbles your speech and doesn't force your mouth open), the "Style" plugin allows you to make your Deluxe Gag look like a harness, or a half harness, or be totally invisible.


(I'm not sure why there's grey in my eyes there, it looks like a picture artifact, it has nothing to do with the harness)


Adjusting

Both the gag and the blindfold are made of unrigged, modifiable mesh, which means you can resize every strap individually. The harness is cut into a few parts to make it easy to fit it to your head and face with minimal effort. However, the panel variant features a fitted mesh strap around the neck (it is necessary because it is so low on the neck that when you turn your head, it needs to stretch). Fitted mesh means that you can't move or resize this particular strap, but it's okay. The only thing that makes your neck bigger is the size of your head anyway, and this is precisely what the neck strap is rigged to. In other words and without being too technical, it will always fit you, regardless of the size and the shape of your head.

It is easy adjust your Deluxe Gag. All you have to do is lock it into the configuration that you want (I recommend "Harness ring", "Harness ball" and "Harness panel" because they show all the prims), edit it by right-clicking on it and choosing "Edit", like this :


Then check the "Edit Linked Parts" checkbox on the Edit window, like this :


Then click on all the individual parts to resize them all one by one. There are not many of them, in fact. You have the V-shaped front strap, the V-shaped front panel strap, the panel itself, the Y-shaped top strap and the jaw strap. Plus the restraint parts such as the ball, the ring and the bit, as well as their respective straps if any (the ball and the ring both have their own dedicated straps, the bit does not).


There is an invisiprim in front of the panel part that is meant to hide your lips (they poke through the panel otherwise). I know that most viewers, like Firestorm for example, cannot render invisiprims in Advanced Lighting Model. The reason behind this choice is beyond me, since they do render invisiprims when ALM is off, but they don't when ALM is on. Go figure. They should either render in all cases or not render at all. But the RLV and a few other viewers like Cool VL and Dolphin DO render invisiprims and this is what permits the Deluxe Gag to hide your lips when "Harness panel" is chosen, and to let them show otherwise. However, if your viewer cannot render invisiprims, you still have the option of wearing an alpha layer that is included in the box, it is named "Deluxe Gag panel hide lips". So to recap : if your viewer can render invisiprims, you don't need the alpha layer, but if it cannot, then you do need it.


Lastly, there is some clutter near the mouth : the invisiprim, the ball, the three lips straps, the bit, the panel... They can get in the way when you want to adjust what's close to the mouth. It might be interesting to move them away temporarily when you need to select something underneath. To do this, simply move a prim (say, the invisiprim) to the front until you have access to the ball (for example), work on the ball, adjust it the way you like, then click on the invisiprim again and press Ctrl-Z to undo the latest modification you made on it, i.e. the translation. And voilà, the invisiprim will be back to where it was, without you needing to move it a second time.


You can find the RealRestraint Deluxe Gag & Blindfold in any of the RealRestraint vendors in-world, it is Modify, No-copy and Transfer, and costs L$450 :


Have fun !

Marine
Viewing all 249 articles
Browse latest View live


<script src="https://jsc.adskeeper.com/r/s/rssing.com.1596347.js" async> </script>